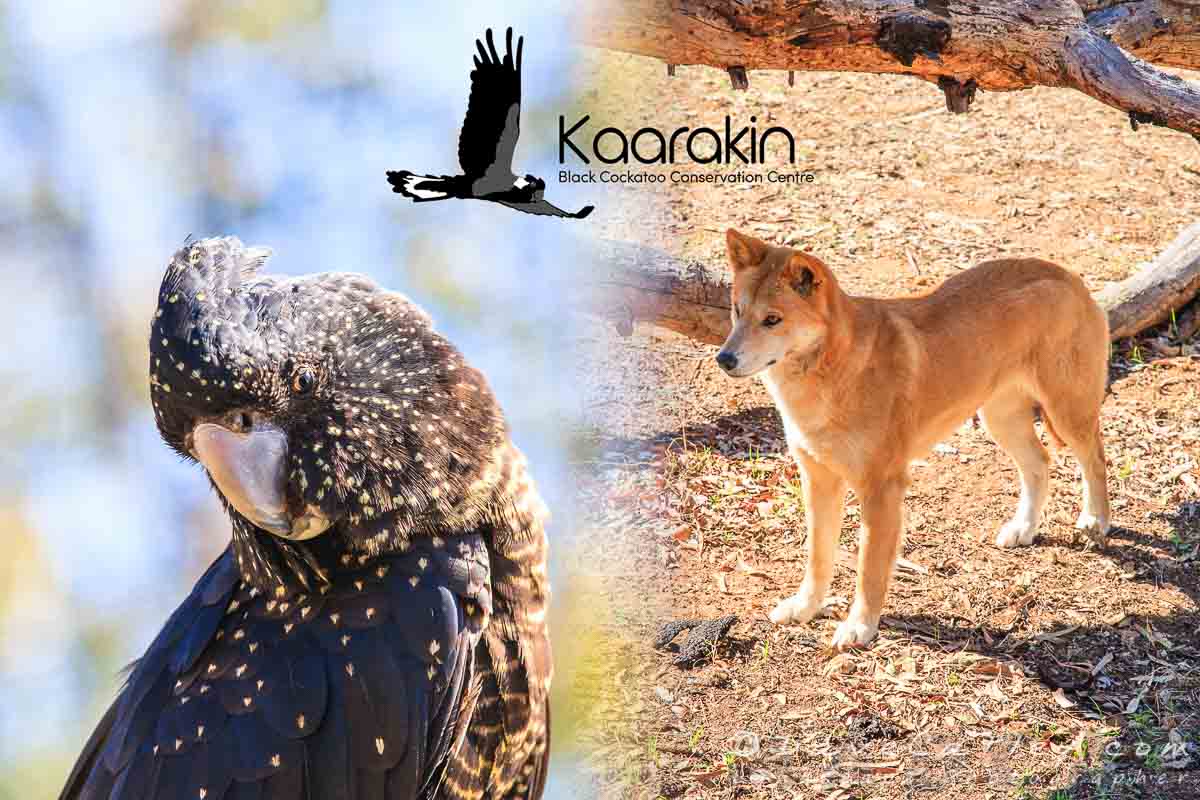
Last weekend I attended my first Tour Day at the Kaarakin Black Cockatoo Conservation Centre and I must say it was amazing and worth every bit of the low $15 booking fee 😃
Tour Day, KaarakinBlack Cockatoo Centre, Western Australia
Located in the Banyowla Regional Park in the Perth Hills on a former tourism wildlife park site their purpose is to protect and rehabilitate our native wild black cockatoo species here in Western Australia.
As the tour begins we are given an introduction to the organisation, the work they do and how they are working to restore the site to it’s original native state along with several other revegetation projects in WA.
First stop is the Kangaroo enclosure containing a community of Red & Western Grey Kangaroos left over from the old wildlife park. Sadly these Kangaroos have been isolated for decades, they are suffering from inbreeding and cannot be released back into the wild so they are cared for as best as possible.
Kangaroos, Kaarakin Black Cockatoo Centre, Western Australia
Next came the Emu enclosure, where we found that our Tour Guide had a strangely close relationship with the resident Emu’s. Personally I don’t think I’d trust getting up close & personal with an Emu!
Emu, Kaarakin Black Cockatoo Centre, Western Australia
Finally we arrived at the Dingo enclosure, something I was really looking forward to and I wasn’t disappointed.
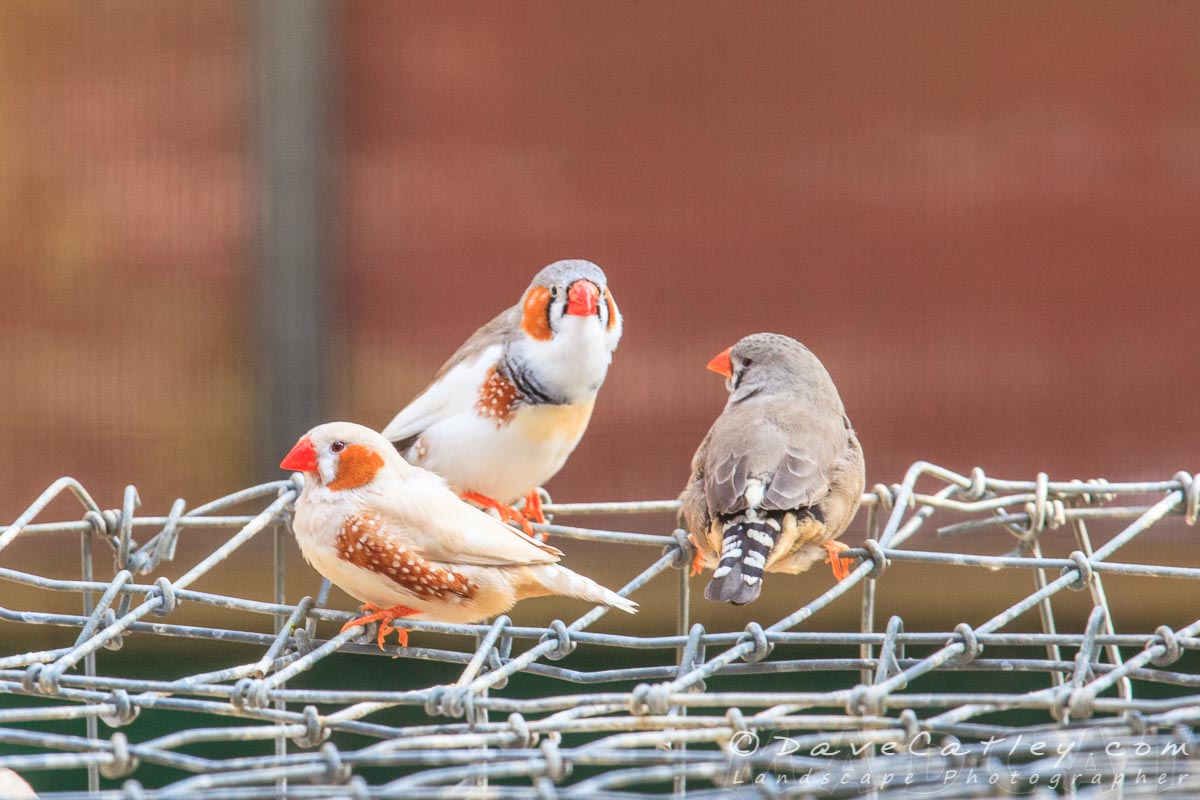
On the way into the Dingo enclosure is an aviary full of beautiful Finches.
Finches, Kaarakin Black Cockatoo Centre, Western Australia
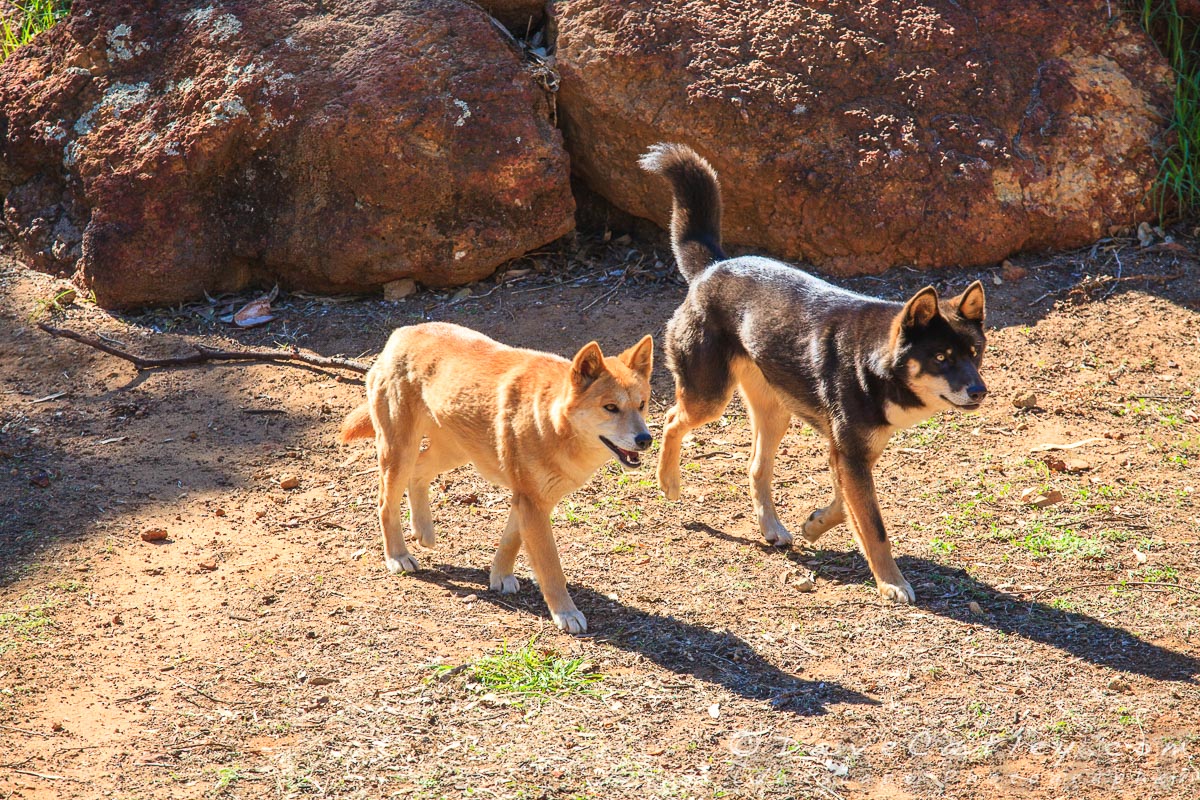
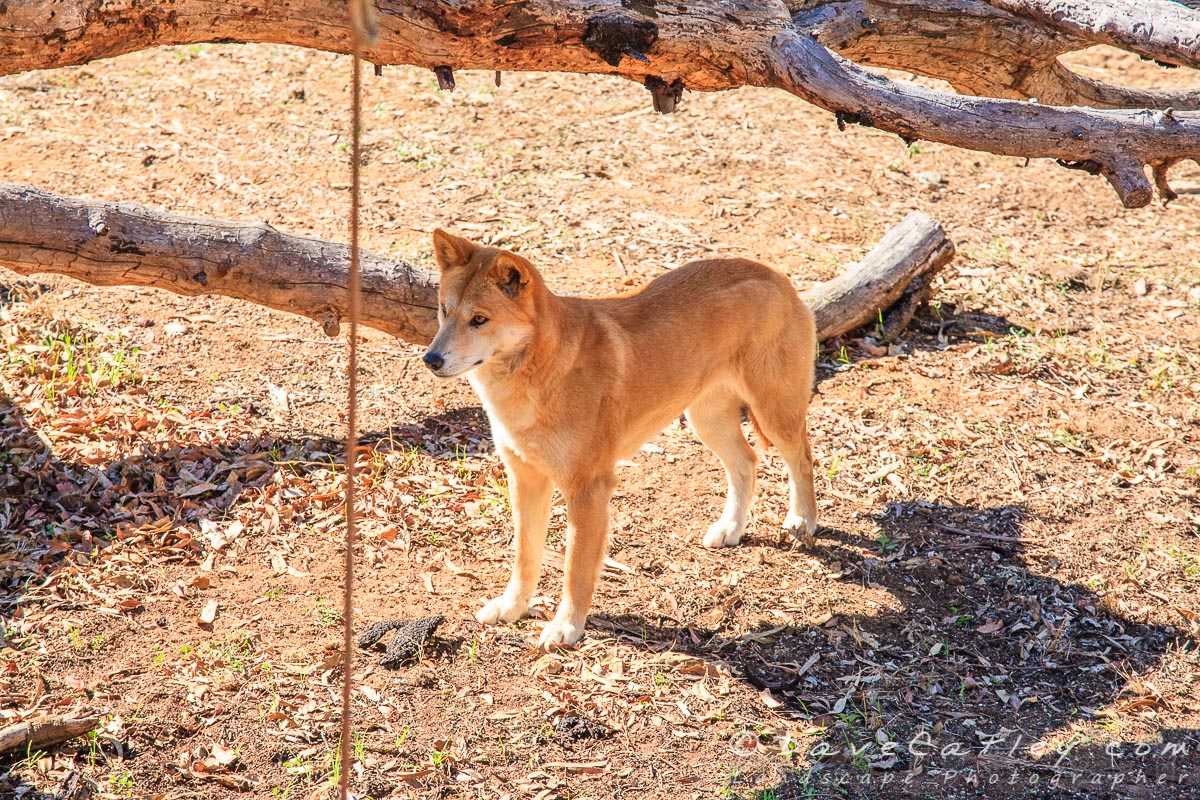
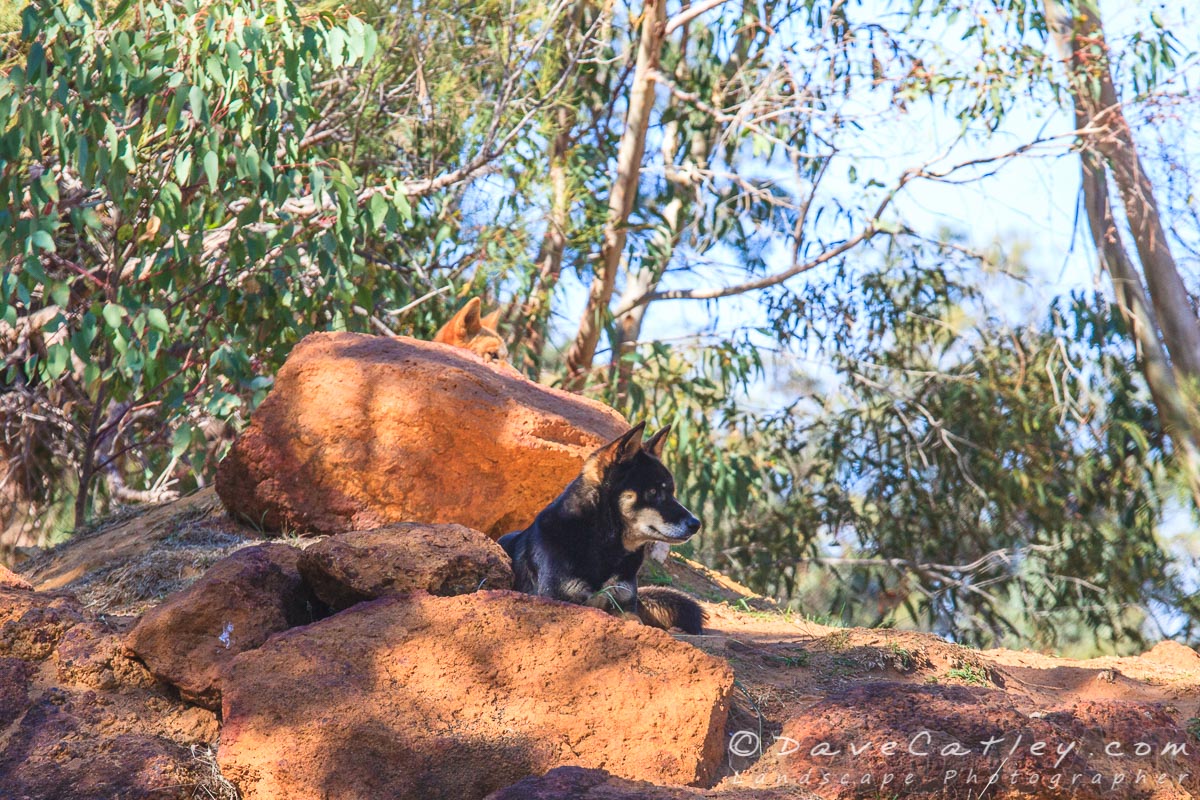
Apparently the Dingoes are walked around the site daily for exercise and also to help prevent / detect any rogue foxes attempting to enter.
Dingoes, Kaarakin Black Cockatoo Centre, Western Australia
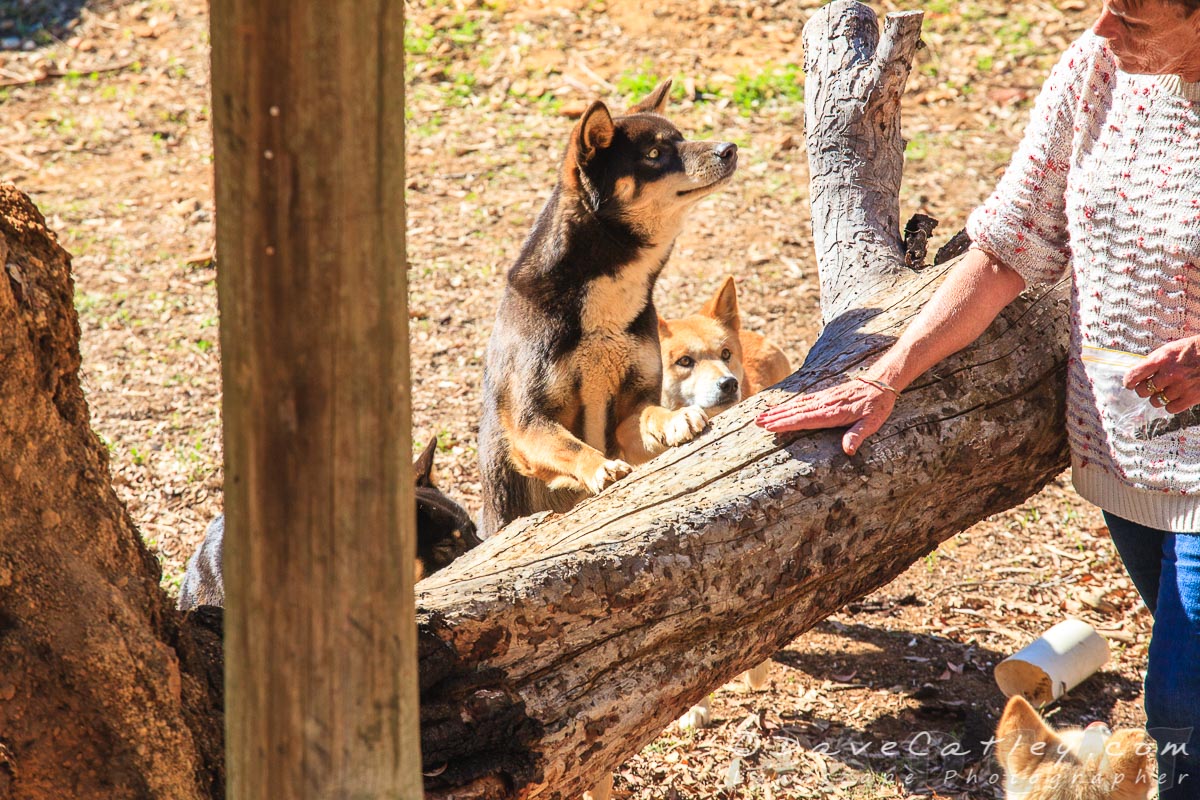
Dingoes have had a bit of a bad rap over the years, including being threatened with removal from the protected native wildlife list (thankfully overturned) but these guys are seriously cute …
Dingoes, Kaarakin Black Cockatoo Centre, Western Australia
Dingoes, Kaarakin Black Cockatoo Centre, Western Australia
Dingoes, Kaarakin Black Cockatoo Centre, Western Australia
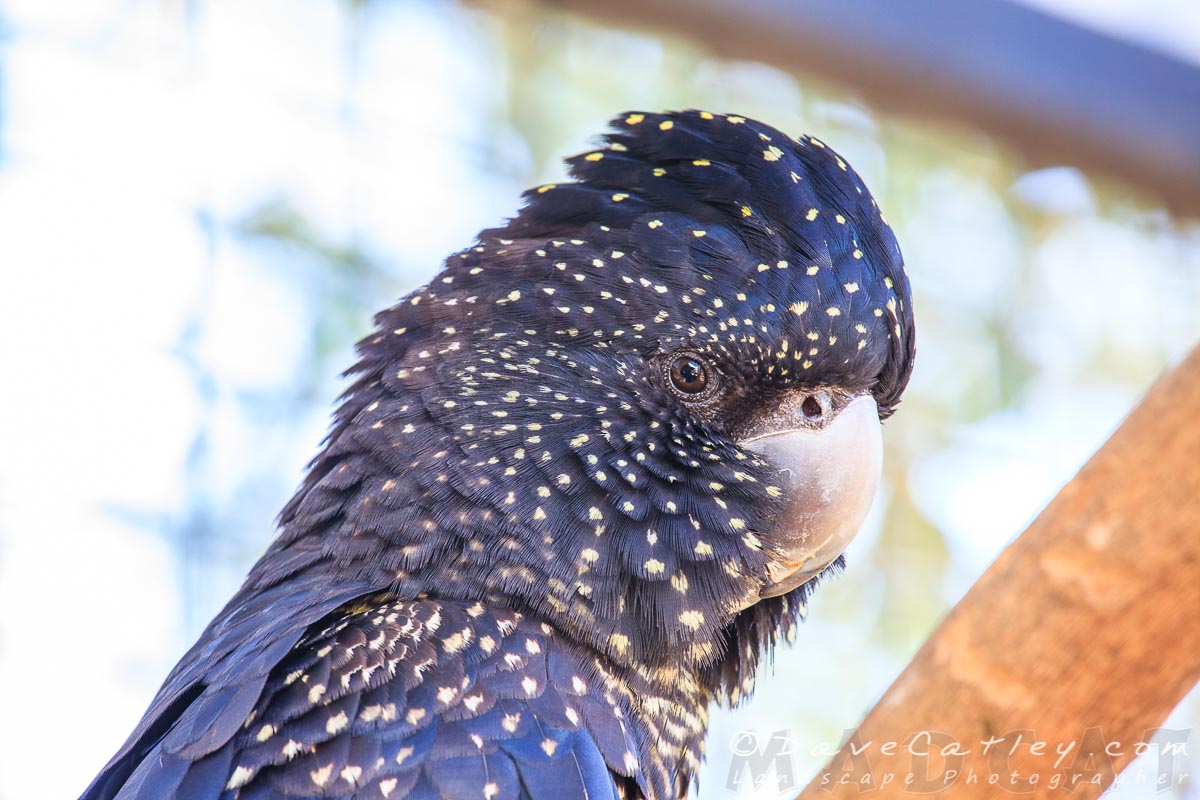
Finally we arrived at the Black Cockatoos and were taught about all the different aviaries designed for different purposes and how injured Cockies are prepared and returned to the wild whenever possible 🐾👍
Black Cockatoos, Kaarakin Black Cockatoo Centre, Western Australia
Having been told how we had to respect the Black Cockatoos space and be respectful, we were then told that they had no intention of doing the same (being wild animals) 🤣
We then had our feet sprayed, removed jewelry and entered the Aviary to play with the Cockatoos, or maybe for them to play with us 😎
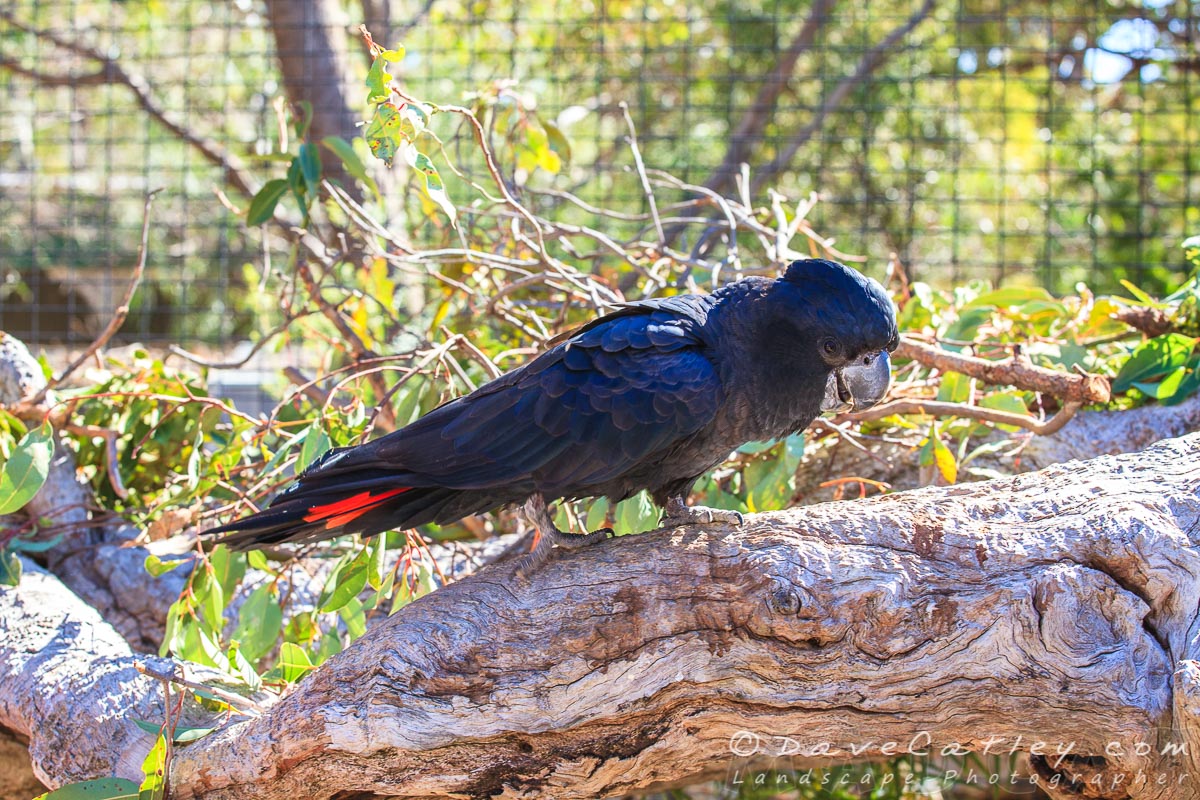
Black Cockatoos, Kaarakin Black Cockatoo Centre, Western Australia
Black Cockatoos, Kaarakin Black Cockatoo Centre, Western Australia
If you’ve never been up close and personal with a group of Black Cockatoos then I highly recommend an experience like this.
They will swoop over you make loud raucous noises and randomly land on shoulders (or heads), and they are a lot bigger than most people would imagine.
Black Cockatoos are, however, incredible social and gentle birds. They will not harm you and you will fall in love straight away ❤
Unlike cuddling Koalas, which should never be allowed as it is stressful and dangerous for the animal, interacting with Black Cockatoos is a two way relationship.
It is also worth pointing out that these “educational” Cockatoos are very familiar with humans and can not be released back into the wild for health reasons. You will never get near a Cockatoo that is being prepared for release as they need to maintain their natural caution of humans.
Black Cockatoos, Kaarakin Black Cockatoo Centre, Western Australia
Black Cockatoos, Kaarakin Black Cockatoo Centre, Western Australia
Black Cockatoos, Kaarakin Black Cockatoo Centre, Western Australia
Black Cockatoos, Kaarakin Black Cockatoo Centre, Western Australia
Black Cockatoos, Kaarakin Black Cockatoo Centre, Western Australia
Black Cockatoos, Kaarakin Black Cockatoo Centre, Western Australia
Black Cockatoos, Kaarakin Black Cockatoo Centre, Western Australia – MADCAT Photography
Black Cockatoos, Kaarakin Black Cockatoo Centre, Western Australia
Black Cockatoos, Kaarakin Black Cockatoo Centre, Western Australia
Black Cockatoos, Kaarakin Black Cockatoo Centre, Western Australia
Please remember that these magnificent Black Cockatoos are highly endangered, if you want to help protect WA’s Black Cockatoo population then support the local organisations that are working hard to keep these amazing birds alive:
Also available at the Gallery are Greeting Cards, Magnets, Keyrings, Mugs, Scarves, Tote Bags, Wall Tapestries, Lens Cloths, unique 3D Printed Gadgets & Gizmo’s and much more …
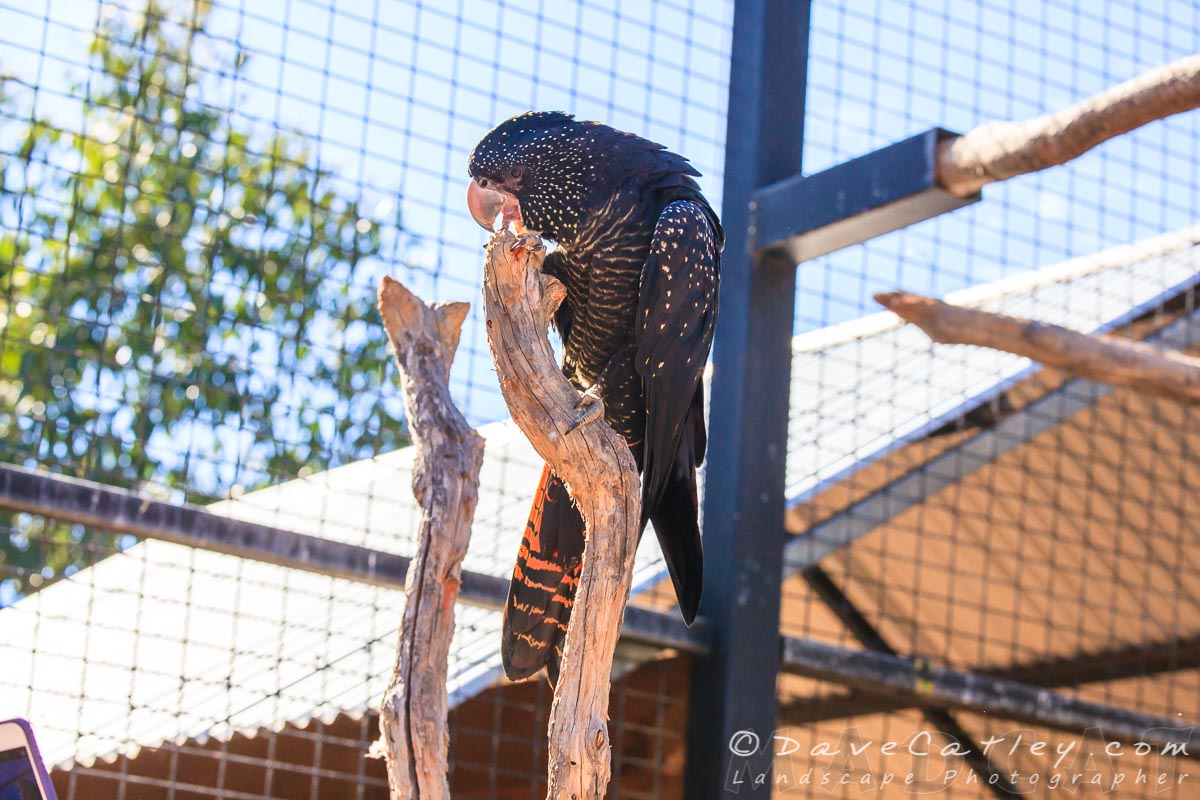
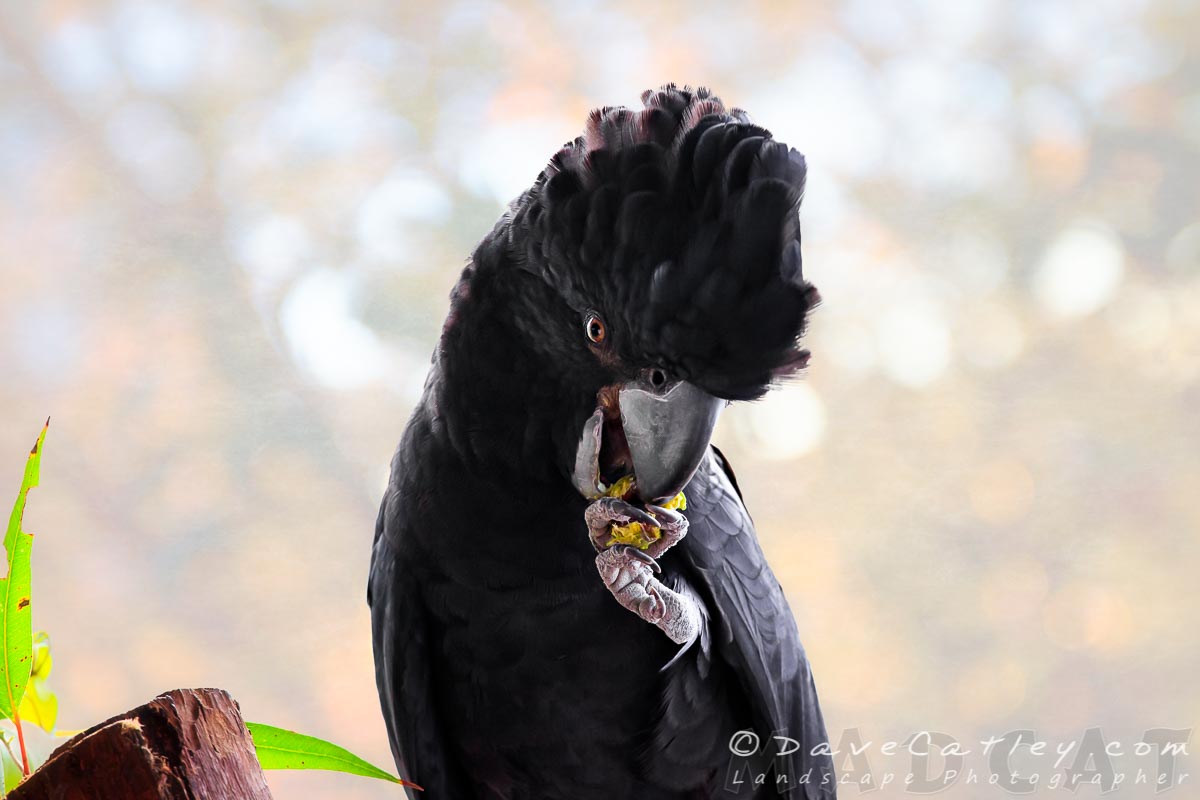
I got some great Black Cockatoo images from the recent open day at Native Animal Rescue here in Perth but I wasn’t expecting this!
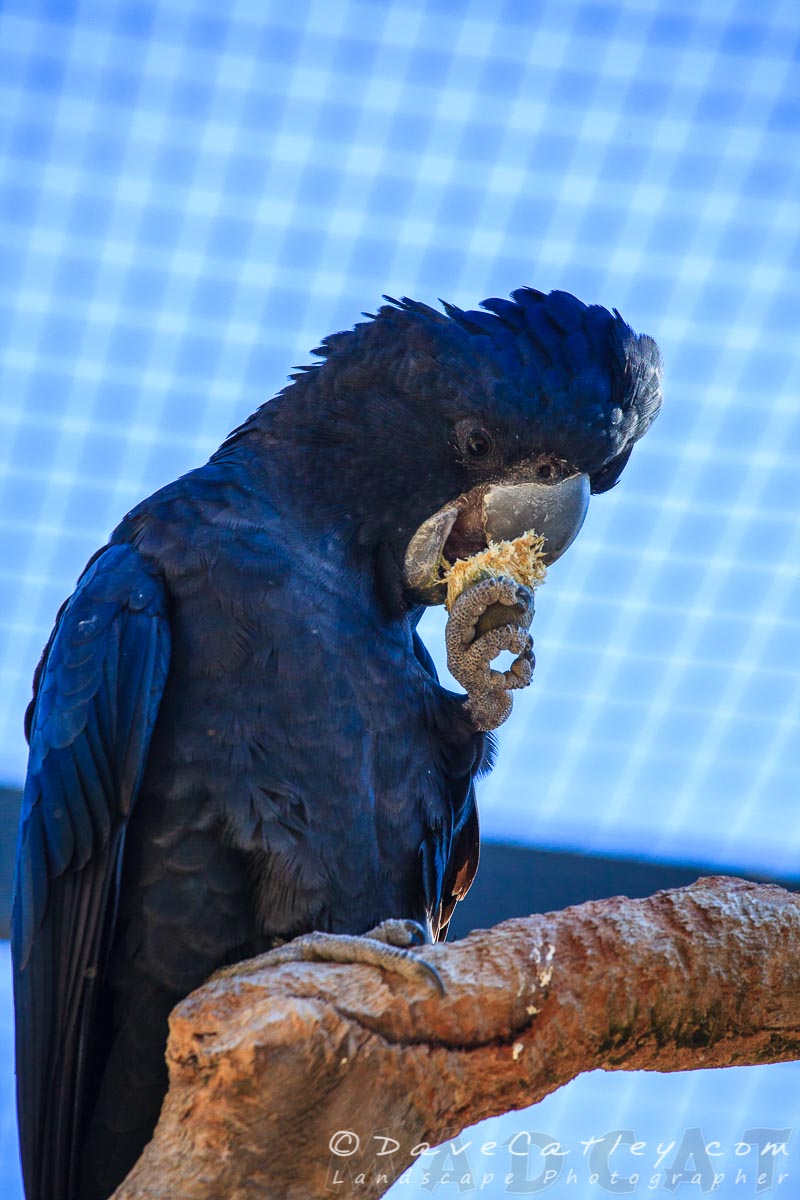
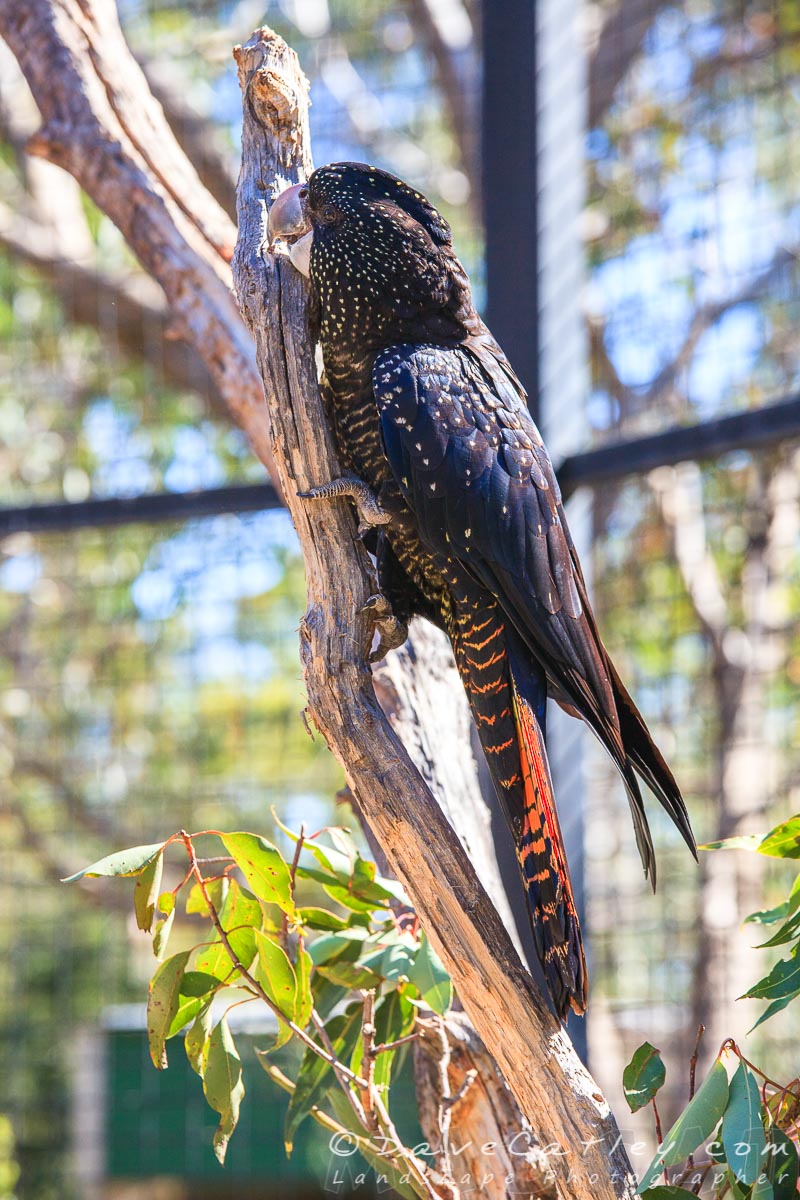
This particular trio of images feature Obama, one of their resident Red-Tailed Black Cockatoos chewing on a gum nut. It wasn’t until I got home and checked out the images that I realised that his nut had exploded with perfect timing.
A Short Timelapse Video Experiment
The trio of images looked so good that I decided to experiment with a short Timelapse video showing just how seriously these guys take their gum nuts 😎 I just love how his claws open up in the second shot as the nut explodes.
I’ve been meaning to make some video’s for a while now and initially thought I should just do it in Photoshop. While I did successfully create a video very similar to the above in Photoshop I found it somewhat inefficient, especially when I just wanted to make small changes.
Eventually I remade the video in much less time using Premier Pro, and that included reminding myself exactly how Premier Pro worked. However, if Photoshop is all you have access to then it will work fine for simple videos like this one 👍
Here are the individual images …
Obama the Red Tailed Black Cockatoo
Obama the Red Tailed Black Cockatoo with Exploding Nut!
Obama the Red Tailed Black Cockatoo
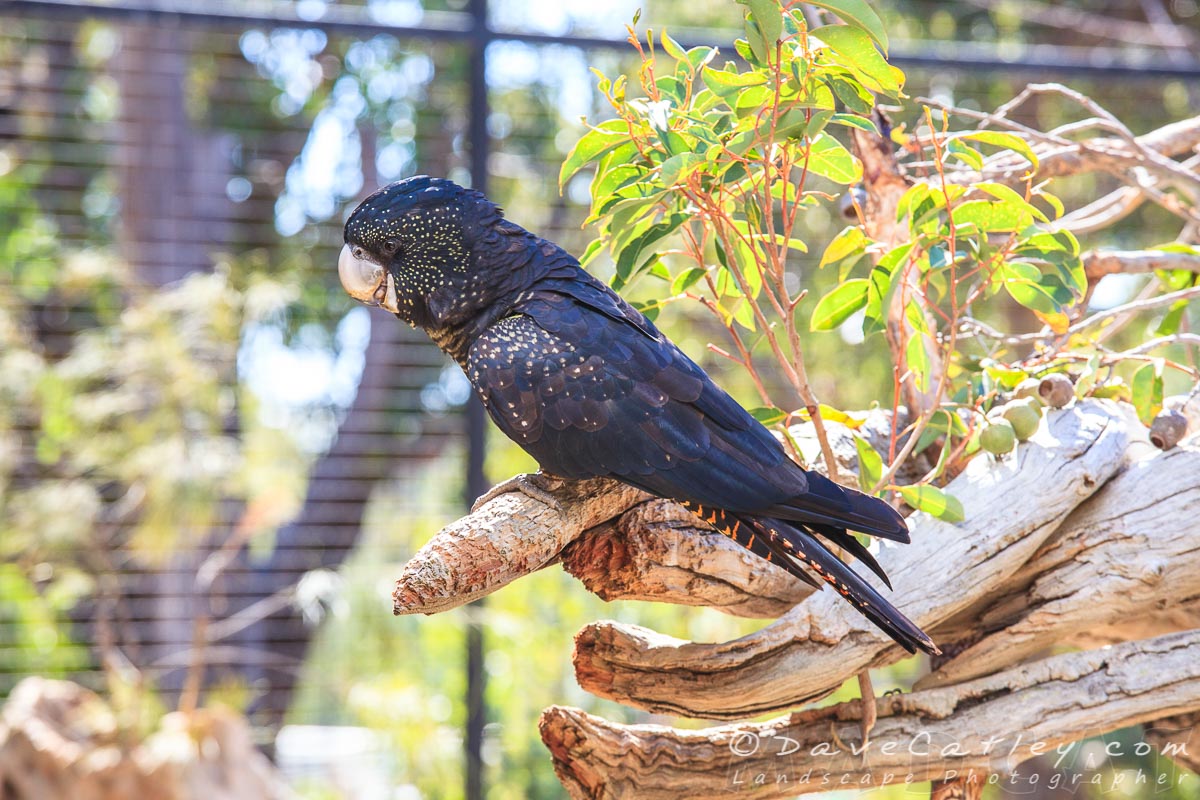
These 3 images are available now as Fine Art Prints or on any of our Photo Products. I’m thinking a Triptych of square canvases or Aluminium Prints would look amazing 😃
Please remember that these magnificent Black Cockatoos Cockatoos are highly endangered, if you want to help protect WA’s Black Cockatoo population then support the local organisations that are working hard to keep these amazing birds alive:
Also available at the Gallery are Greeting Cards, Magnets, Keyrings, Mugs, Scarves, Tote Bags, Wall Tapestries, Lens Cloths, unique 3D Printed Gadgets & Gizmo’s and much more …
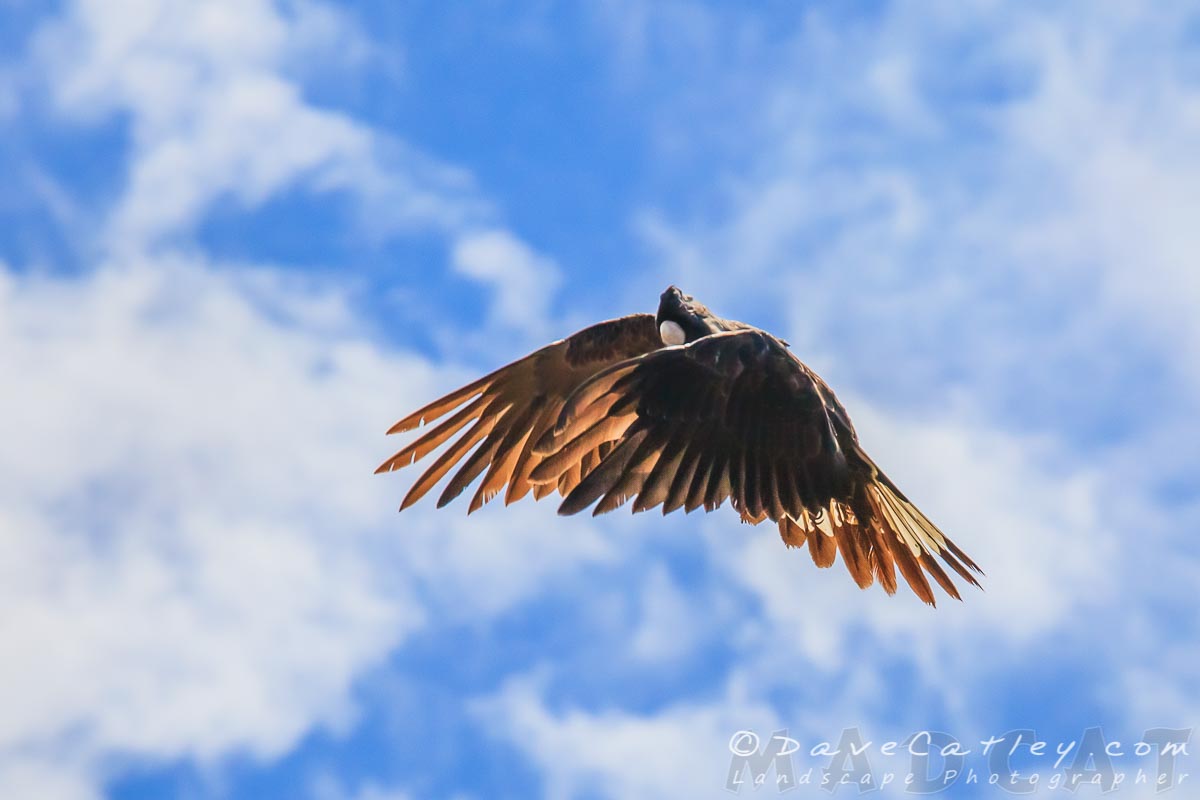
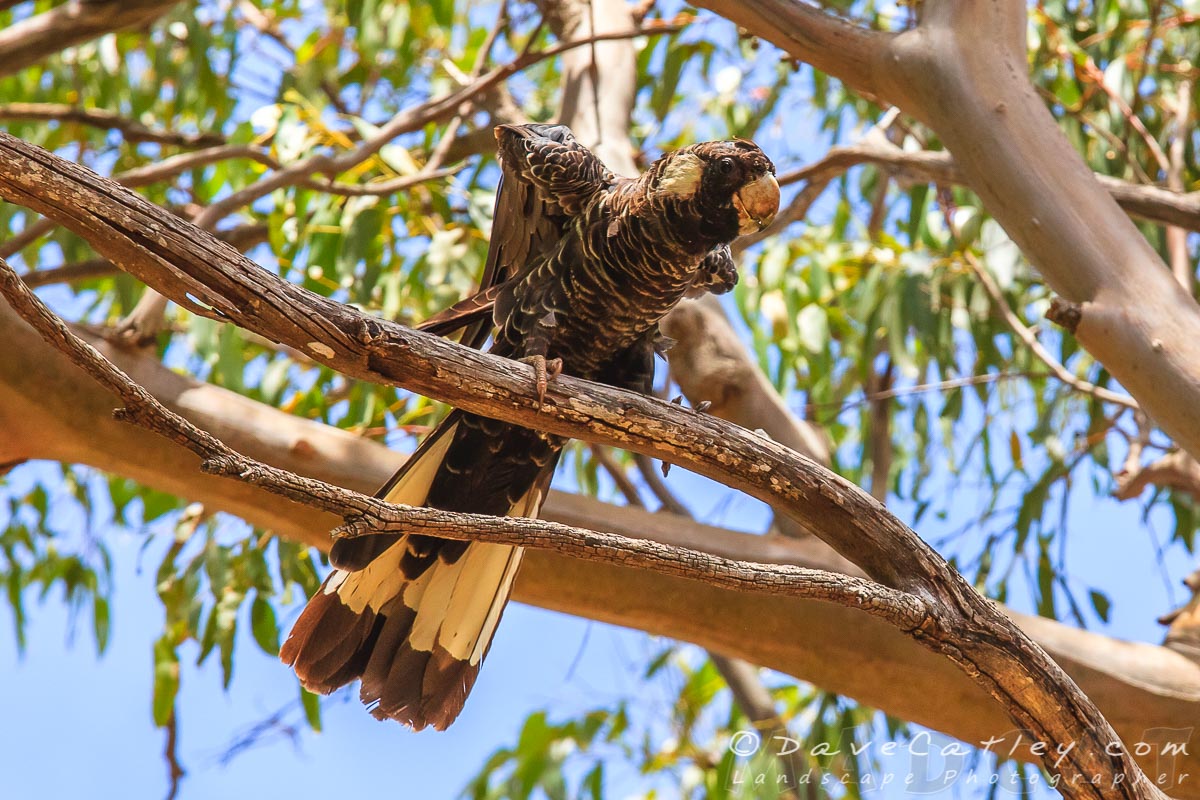
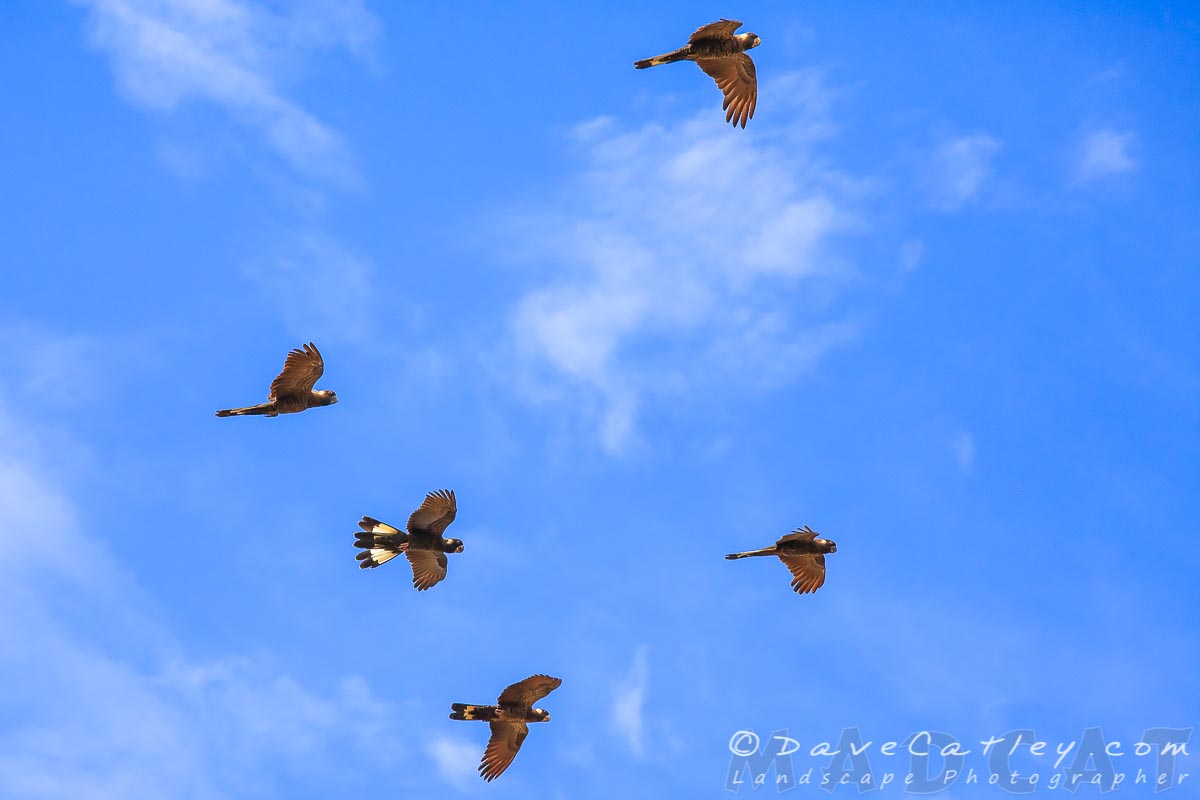
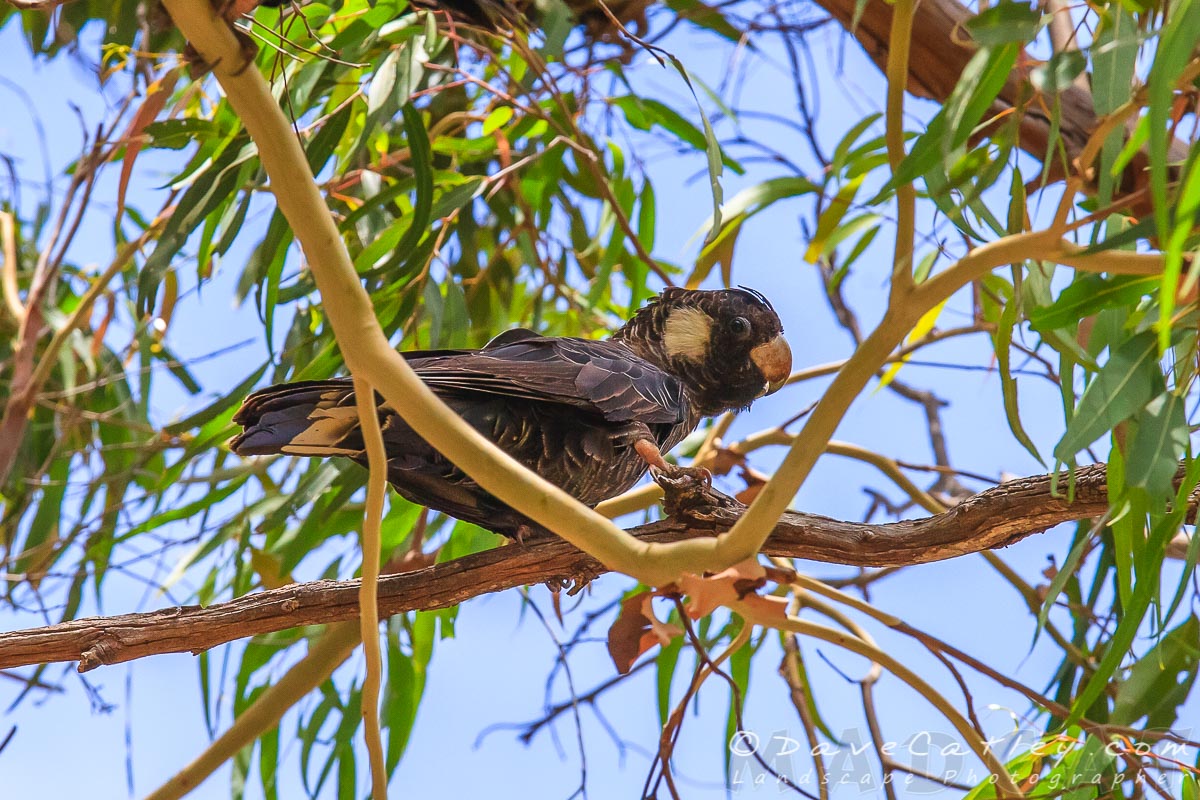
The Carnaby Black Cockatoos were out in Yanchep National Park last week when we turned up there for a walk. Noisy as ever they paraded around the treetops with their usual majesty and charm allowing me to get some great photos.
Carnaby Black Cockatoos, Yanchep National Park, Perth, Western Australia
Black Cockatoos truly are magnificent, you really have to see one up close to realise just how big and beautiful they are. They each have a unique character and are very friendly & gentle creatures.
Carnaby Black Cockatoos, Yanchep National Park, Perth, Western Australia
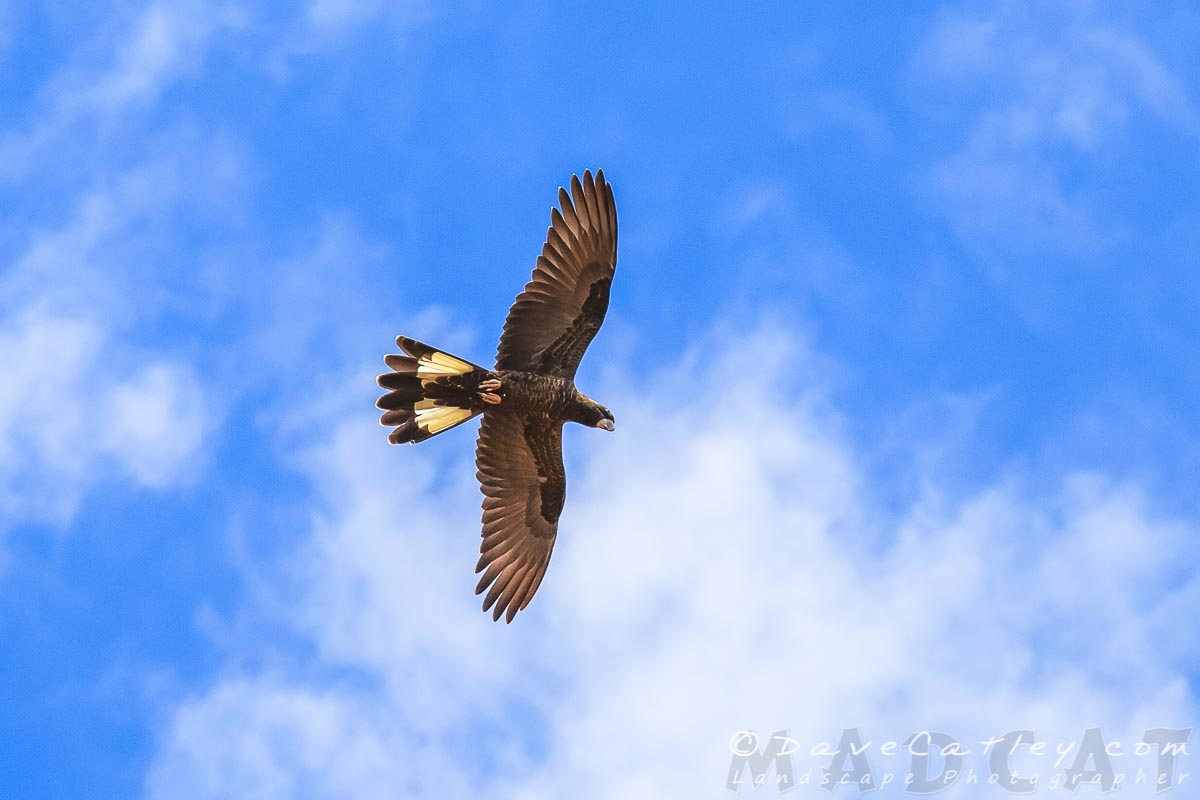
But the sad thing is Black Cockatoos are highly endangered!
Carnaby Black Cockatoos, Yanchep National Park, Perth, Western Australia
A survey in April last year known as the “Great Cocky Count”, held here in South Western Australia, reported that Carnaby Black Cockatoo numbers had fallen by 35% over the last year. Carnaby’s are only found here in Western Australia and their numbers are dropping due to increasing decimation of their habitat and food sources due to urban and industrial development.
Carnaby Black Cockatoos, Yanchep National Park, Perth, Western Australia
There will be another “Great Cocky Count” in April this year, conducted by Birdlife Western Australia, volunteers will count Carnaby’s & Red-tailed Black Cockatoo’s at known roost sites across South Western Australia.
Carnaby Black Cockatoos, Yanchep National Park, Perth, Western Australia
Carnaby Black Cockatoos, Yanchep National Park, Perth, Western Australia
Carnaby Black Cockatoos, Yanchep National Park, Perth, Western Australia
If you want to help protect WA’s Black Cockatoo population then support the local organisations that are working hard to keep these amazing birds alive:
Also available at the Gallery are Greeting Cards, Magnets, Keyrings, Mugs, Scarves, Tote Bags, Wall Tapestries, Lens Cloths, unique 3D Printed Gadgets & Gizmo’s and much more …
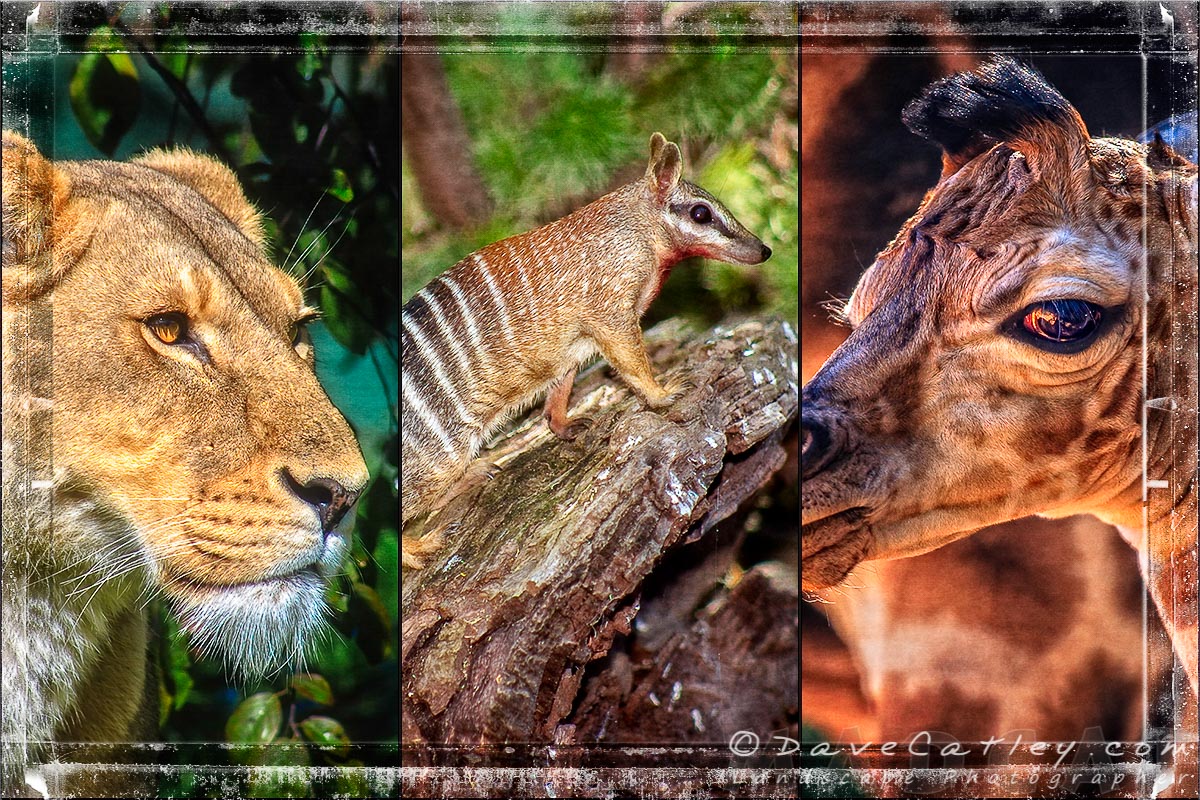
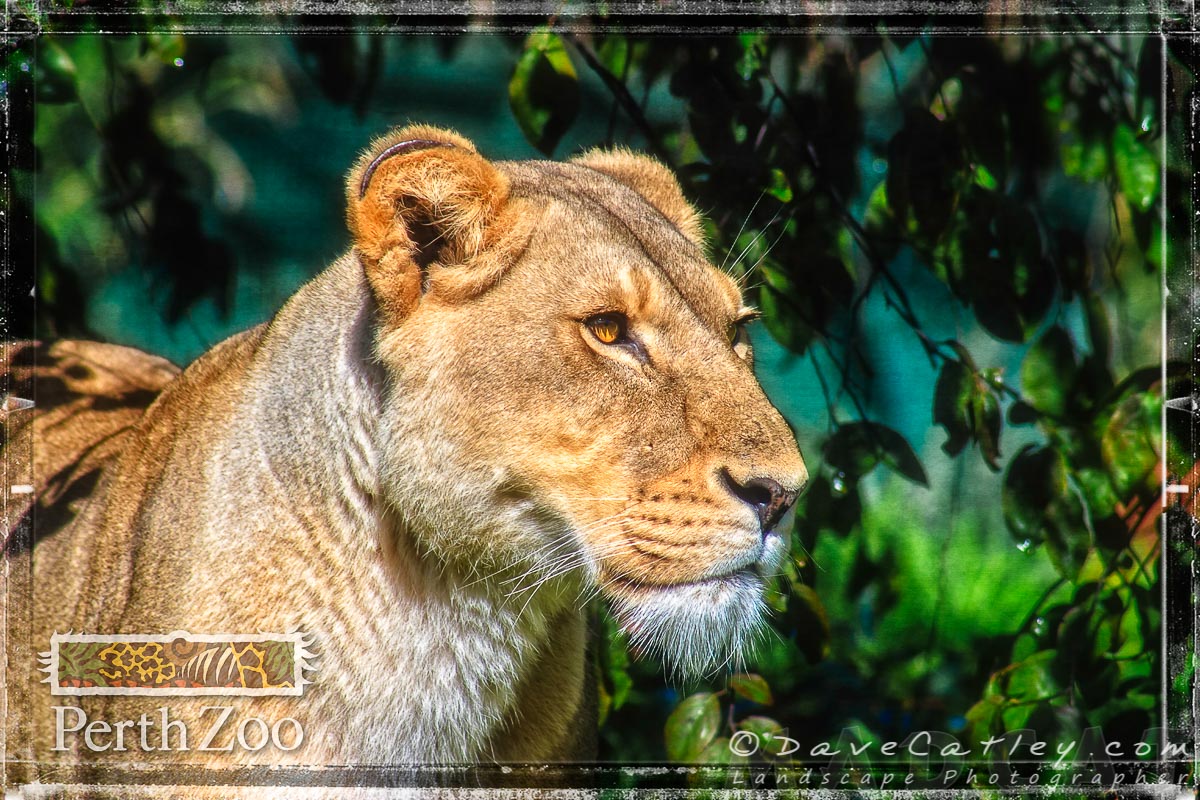
Perth Zoo is an amazing place to visit and experience some of the incredible wildlife from Australia & around the world. To be honest we haven’t been to the Zoo for many years, must be time for another visit, I’m sure there have been many changes over the past few years.
African Lion, Perth Zoo, South Perth,Western Australia
Baby Giraffe, Perth Zoo, South Perth,Western Australia
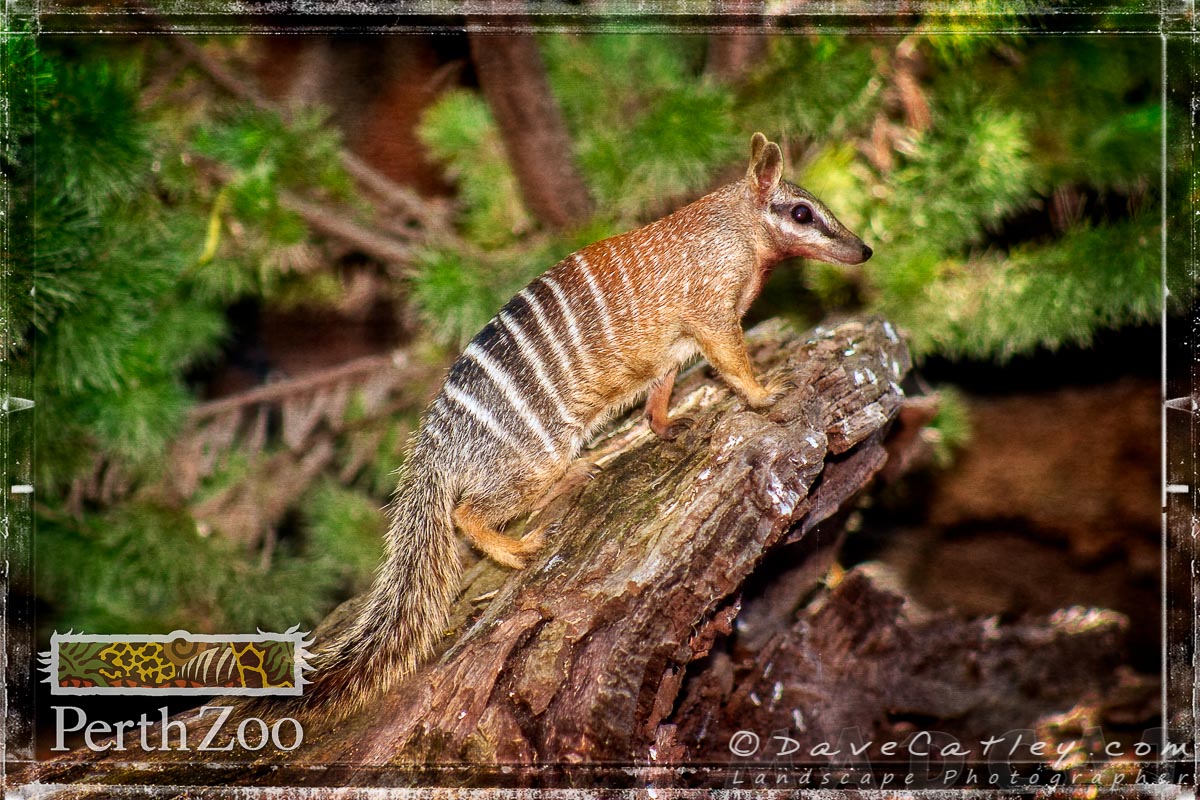
Bonzai the Numbat, Perth Zoo, South Perth,Western Australia
These gorgeous creatures were captured during our visits between 2003 & 2010 when we were working with the Zoo on their website and I decided to have a play around with them to create some Perth Zoo Photo Art.
Sadly Bonzai the Numbat has since passed away but we were proud to have our images used on the signage around his enclosure for a few years before he died.
Perth Zoo and many other zoo’s around Australia and the World do an amazing job help protect & preserve our wildlife, we owe it it to them to do what we can to support these efforts.
Post Processing
All images were processed in Adobe Lightroom, ON1 Photo RAW 2018 & Adobe Photoshop.
Did you know it’s a proven fact that being out in nature is great for your mental and physical health! While you won’t get the full health benefit from our range of prints and photo gifts they are always a great reminder of where you’d rather be. So be sure to check out our range of Fine Art Prints here in our online gallery and our unique photo gifts (scarves, wall tapestries, beach towels, tote bags and much more) at madaboutwa.com.au.
Note: Our Perth Zoo images are not for sale currently though we would dearly love to create more amazing images and products that could help support the Zoo.
Southern Boobook Owl Triptych, Mindarie, Western Australia
Bird photography can be a time consuming process but rewards can pay of at the least expected times. a few days a go I got a call from my mum to say she had spotted a small owl in her back garden. As an avid owl lover mum has owl ornaments and images all around her house & garden so maybe this little guy just felt at home in her garden …
Southern Boobook Owl Triptych, Mindarie, Western Australia
Anyway, we headed off to mum’s to check out this visitor of hers hoping that he would still be there … and he was. We found him nestled in the foliage of a small tree in the garden. Luckily for us the tree’s foliage was dense enough to keep him protected but with enough gaps that we could get a good view of him, it’s not often you get so lucky 🙂 Ironically the only reason mum spotted him was because the local birds were going crazy about his presence, fluttering around the tree and and making a rawkus noise. But then it is spring and no doubt they were a little concerned about their nests becoming potential dinner plates!
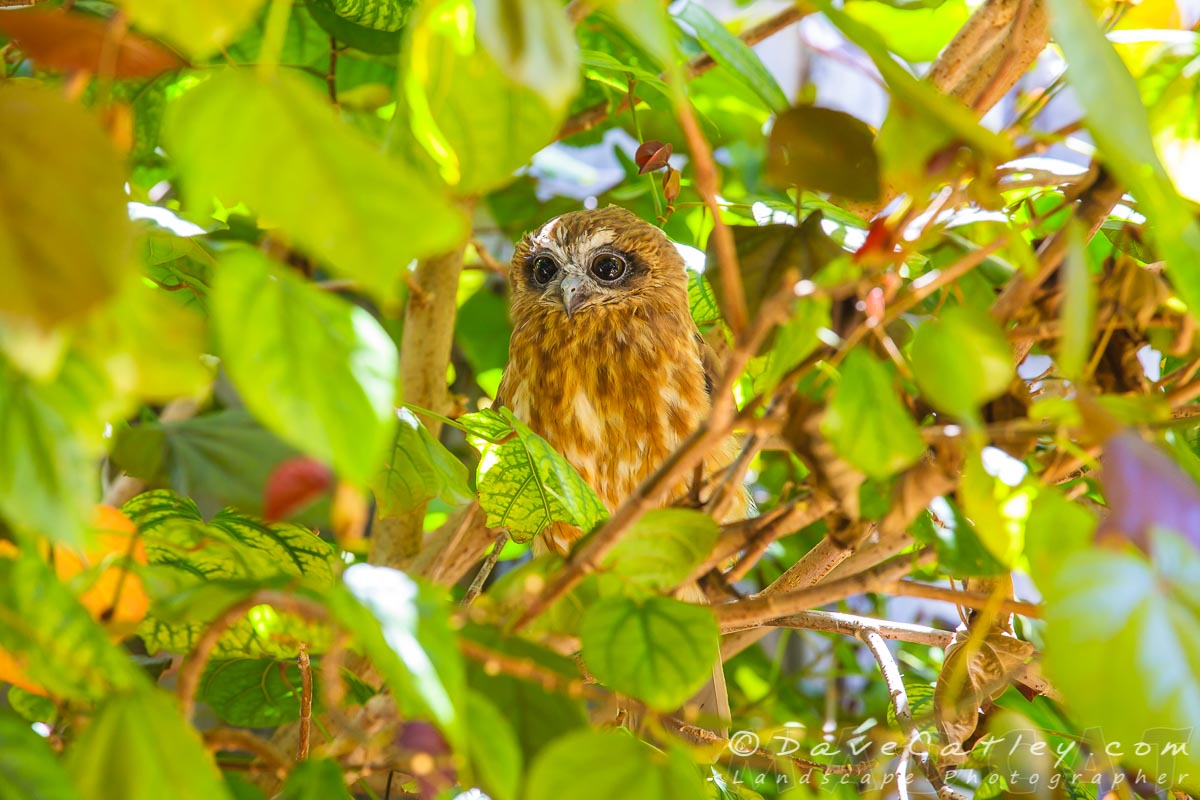
Southern Boobook Owl, Mindarie, Western Australia
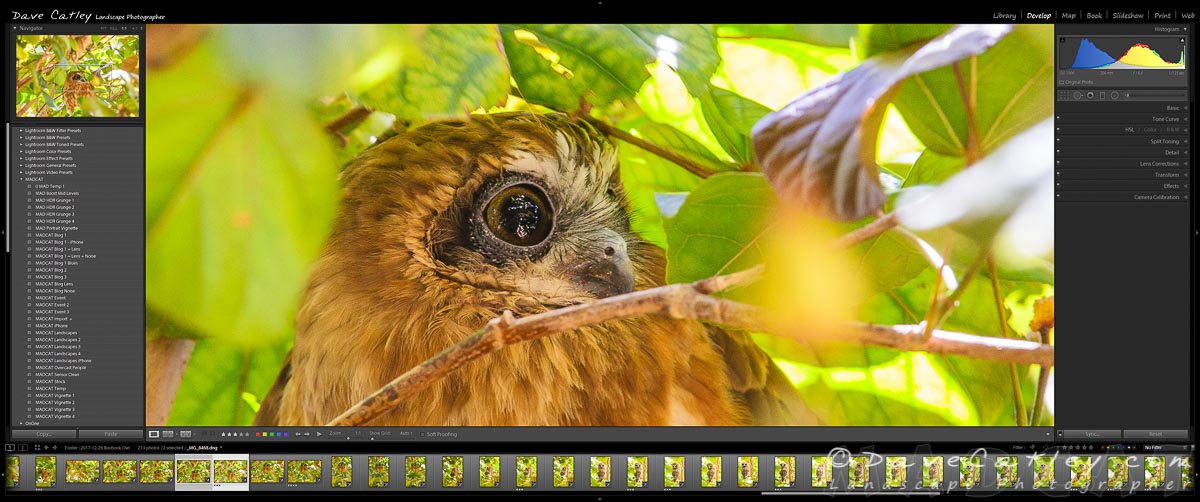
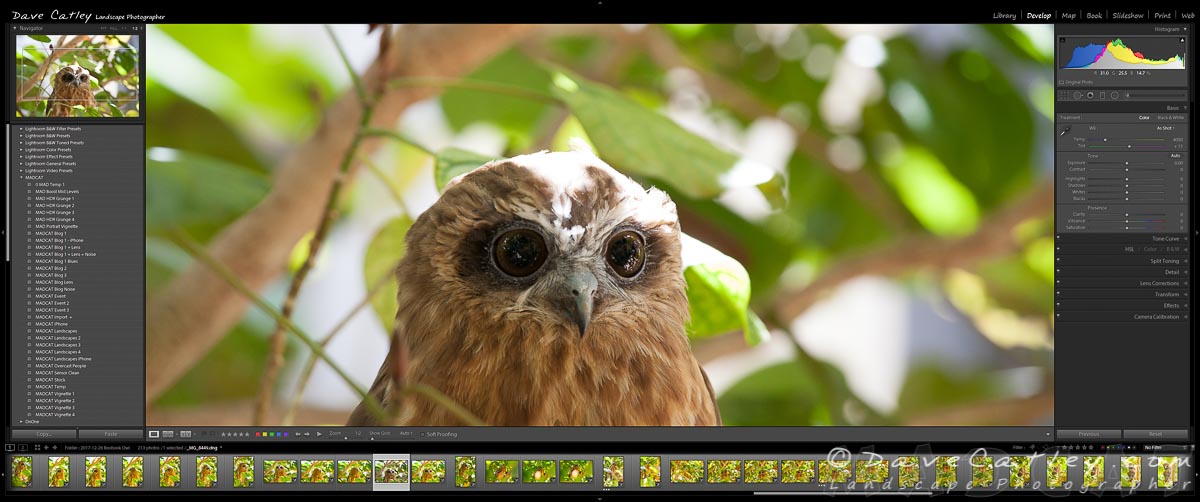
Maggie began looking into what type of owl he was while I started snapping away with my 70-200mm. The late afternoon sun was behind him making the light interesting and challenging. I knew the bright blue glimpses of sky would be blown out but the important thing was getting the owl exposed perfectly and retaining the brilliant green of the backlit foliage. The little guy was barely moving so shutter speed wasn’t so important but I still needed to keep it up high enough to prevent any camera shake. It was pretty dark inside that tree and after a bit of experimentation I compromised at manually setting my exposure to 1/160th, f7.1 & ISO 1000 and I was very happy with how that worked out. Noise levels were very low even with the shadows brightened up in Lightroom and the level of detail around his eyes was astounding as you can see from the exploded view below.
Lightroom Close Up of Southern Boobook Owl, Mindarie, Western Australia
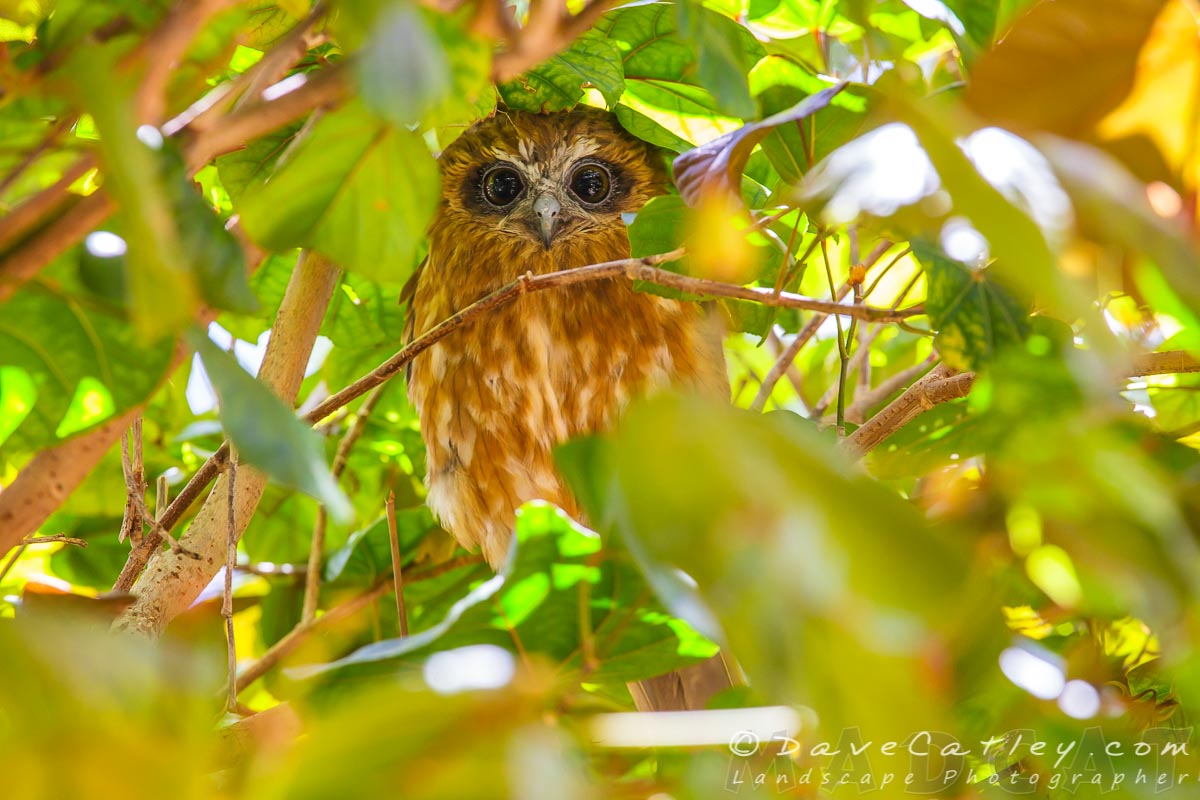
Although the owl was not moving all that much it was a windy day and the leaves were blowing around all over the place making it tricky to frame the owl and causing the sunlight to randomly blow out parts of the owls body.
Blown Out Patches – Southern Boobook Owl, Mindarie, Western Australia
All up we were there for around 40 mins, I took 213 photos and got some crackers. Turns out he was a Southern Boobook Owl, quite common around here though not so much in backyards! One good tip for photographing animals is to always focus on the eyes. At 200mm in low light depth of field is often sacrificed for shutter speed and if the eyes are not pin sharp then the whole image can be ruined.
Focus on the Eyes – Southern Boobook Owl, Mindarie, Western Australia
As usual my initial processing was done in Lightroom followed by adding effects in the new ON1 Photo Raw 2018 with some final tweaking in Photoshop, the Master File is then imported back into Lightroom from where I can export it in any format as required. All 3 tools have their benefits and work well together to produce a final image that is extremely high quality and suitable for any purpose.
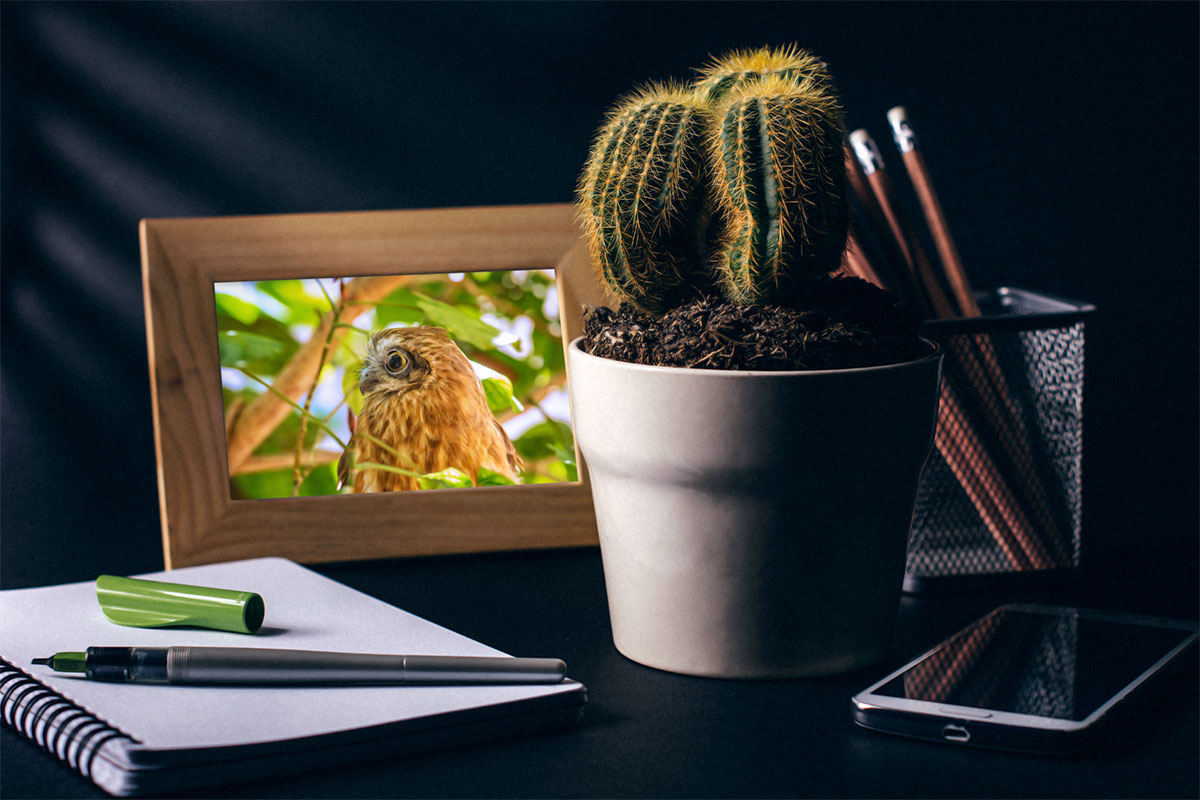
Southern Boobook Owl, Mindarie, Western Australia – Tabletop Print Suggestion
I haven’t really looked at the new version of ON1 Photo RAW 2018 short of using the effects module to create & apply presets. Keep an eye out for my upcoming review of this very interesting photo processing software package that is becoming serious competition for Lightroom.
Image Details
Location: Mindarie Backyard, Western Australia Date: 26th December 2017 Time: 3pm – 3:40pm Camera: Canon EOS 5D Mk11 Lens: EF 70-200mm f/4L IS USM Camera Mode: Manual Exposure: 1/160 sec, f7.1 at ISO 1000
It’s a proven fact that being out in nature is great for your mental and physical health. While you won’t get the full health benefit from our range of prints and photo gifts they are always a great reminder of where you’d rather be. So be sure to check out the rest of our range of Fine Art Prints at madcat.com.au and our unique photo gifts (scarves, wall tapestries, beach towels, tote bags and much more) at madaboutwa.com.au.
Lightroom Presets & Brushes are great tools to help you speed up your workflow and improve your creativity. You can create them yourself or purchase / download them from various websites.
This guide will teach you how to install Presets & Brushes that you have downloaded.
For those of you that are more familiar with how Windows / Mac OSX works then the Quick and Dirty guides should be more than enough. For others the Detailed Walkthroughs will tell you everything you need to know.
Installing Lightroom Presets – The Simple Method
Installing Lightroom presets from within Lightroom is a very quick and simple process:
Quick and Dirty:
Go to the Lightroom Develop module
Right click in the Presets tab to create a new folder if required
Right click on the Preset folder you wish to import your new Presets to and select “Import”
Locate the Presets to import and click the “Import” button
Done!
Detailed Walkthrough:
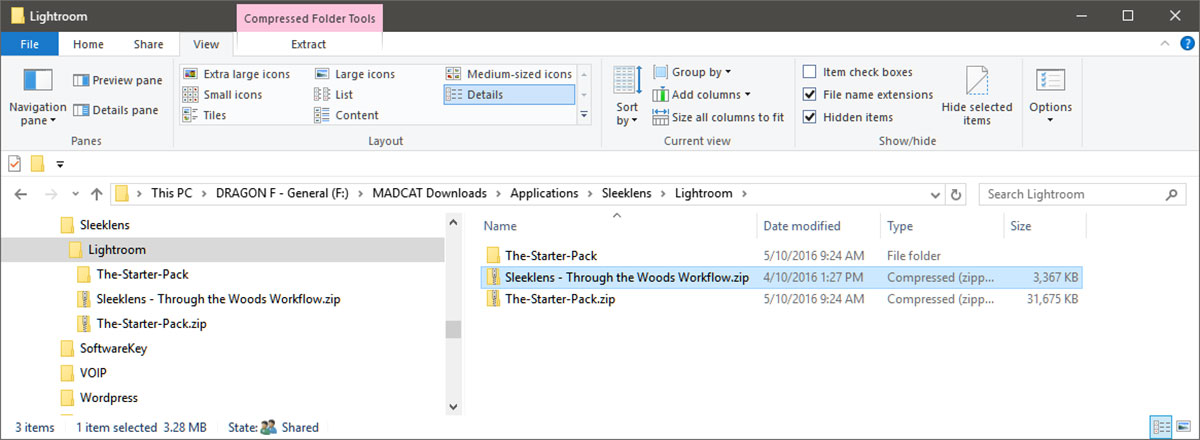
Locate the folder containing the Presets that you want to install.
If you have purchased online or downloaded free samples they will most likely be in a “zip” file
Locate the Downloaded Presets
Unzip the file you downloaded (if required):
Windows – Right click on the file, select “Extract All…”
Mac – Doubleclick on the file
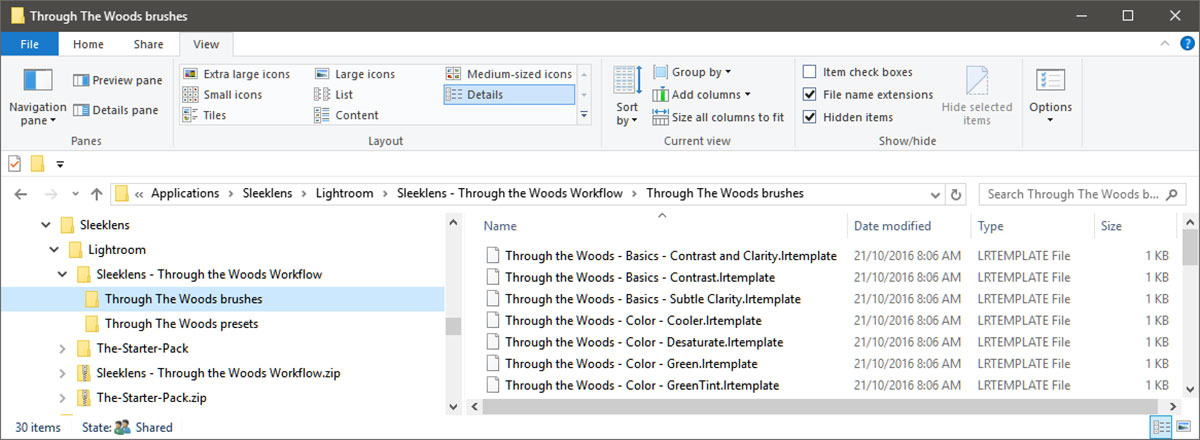
Navigate to the unzipped folder containing the new Presets (they may be in a sub-folder). The Preset files will have a file extension of “.lrtemplate”
Locate the Extracted Preset Folder
Copy the location of the Preset folder to the clipboard
Windows – Right click on the Windows Explorer address bar and select “Copy address as text”
Mac – Right click on the Finder folder then hold down the Option key and select “Copy <folder name> as Pathname”
Run Lightroom and enter the “Develop” module
At this point you can either:
Select an existing Preset folder to install your presets into
or …
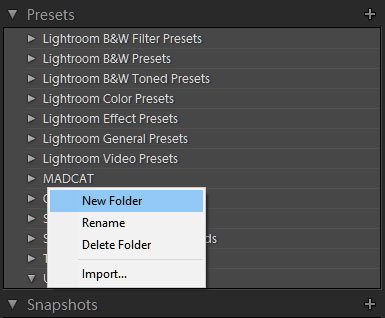
Right click anywhere in the Presets tab on the left and select “New Folder”
Create a New Preset Folder in Lightroom
Name your folder something meaningful. I generally start with the name of the supplier and then the name of the collection if there will be more than 1 i.e. “Sleeklens – Through The Woods” so that all presets from the same supplier will be grouped together with each set in it’s own folder. But that’s just me, go with whatever floats your boat 🙂
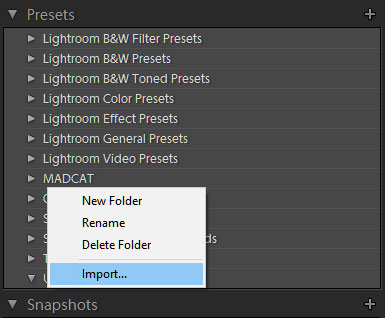
Right click on the chosen folder and select “Import” …
Import New Presets in Lightroom
Locate the Presets you wish to install. If you copied the folder path in step 3 then paste it into the import window:
Windows – Right click on the address bar and select “Edit address”, right click again and select “Paste” then press “Enter”
Mac – Press “CMD+SHIFT+G” then “CMD+V” and click on “Go”
Select the Presets to import and click “Import”
Your Presets are now ready to use
Done!
Installing Lightroom Presets – Behind the Scenes
If you want to understand what happens Behind the Scenes when you install presets or want to know how to do it manually it’s not really that much harder:
Quick and Dirty:
Run Lightroom
Open the “Preferences” dialog
Windows – Select “Preferences” in the “Edit” menu
Mac – Select “Preferences” in the “Lightroom” menu
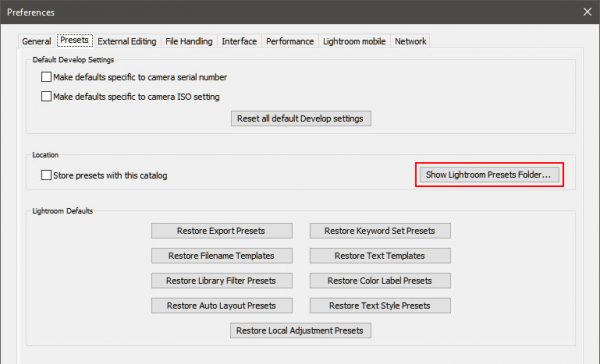
Go to the “Presets” tab and click on “Show Lightroom Presets Folder …”.
A file explorer or finder window will open in the Adobe configuration area
From here navigate into the “Lightroom\Develop Presets” folder
Note, if you have selected “Store presests with this catalog in the Presets tab of the Preferences dialog box then you will have to navigate into the folder containing your catalog and then into “Lightroom Settings/Develop Presets” instead
Create a new folder and copy your new Presets into it
Restart Lightroom and your new Presets will be available in the “Develop” module
Done!
Detailed Walkthrough:
If you need a detailed walkthrough then you probably shouldn’t be doing anything behind the scenes!
Installing Lightroom Brushes
For reasons known only to Adobe there is no interface in Lightroom to import new Brushes. You can create them yourself from the Local Adjustments area but if you want to add new ones you have purchased or downloaded then you’ll have to do it manually.
Ironically, the method for installing new Brushes is almost identical to the “Behind the Scenes” method for installing Presets that I described above!
Quick and Dirty:
Run Lightroom
Open the “Preferences” dialog box
Windows – Select “Preferences” in the “Edit” menu (or press CTRL+,)
Mac – Select “Preferences” in the “Lightroom” menu (or press CMD+,)
Go to the “Presets” tab and click on “Show Lightroom Presets Folder …”.
A file explorer or finder window will open in the Adobe configuration area
From here navigate into the “Lightroom\Local Adjustment Presets” folder
Create a new folder and copy your new Brushes into it
Restart Lightroom and your new Brushes will be available in the “Develop” module
Done!
Detailed Walkthrough:
I know what you’re thinking, a few paragraphs ago I was telling you that you shouldn’t be going Behind the Scenes to install Presets if you needed a detailed walkthrough!
Now I’m telling you that this is the ONLY way to install new Brushes and here is a detailed walkthough … Don’t Panic it’s not that hard and if you follow the instructions below you’ll be fine, honest!
Locate the folder containing the Brushes that you want to install.
If you have purchased online or downloaded free samples they will most likely be in a “zip” file
Locate the Downloaded Presets
Unzip the file you downloaded (if required):
Windows – Right click on the file and select “Extract All…”
Mac – Doubleclick on the file
Navigate to the unzipped folder containing the new Brushes (they may be in a sub-folder). The Brush files will have a file extension of “.lrtemplate”
Locate the Extracted Brushes Folder
Run Lightroom
Open the “Preferences” dialog box
Windows – Select “Preferences” in the “Edit” menu (or press CTRL+,)
Mac – Select “Preferences” in the “Lightroom” menu (or press CMD+,)
Lightroom Preferences – Preset Tab
Go to the “Presets” tab and click on “Show Lightroom Presets Folder …”.
A file explorer or finder window will open in the Adobe configuration area
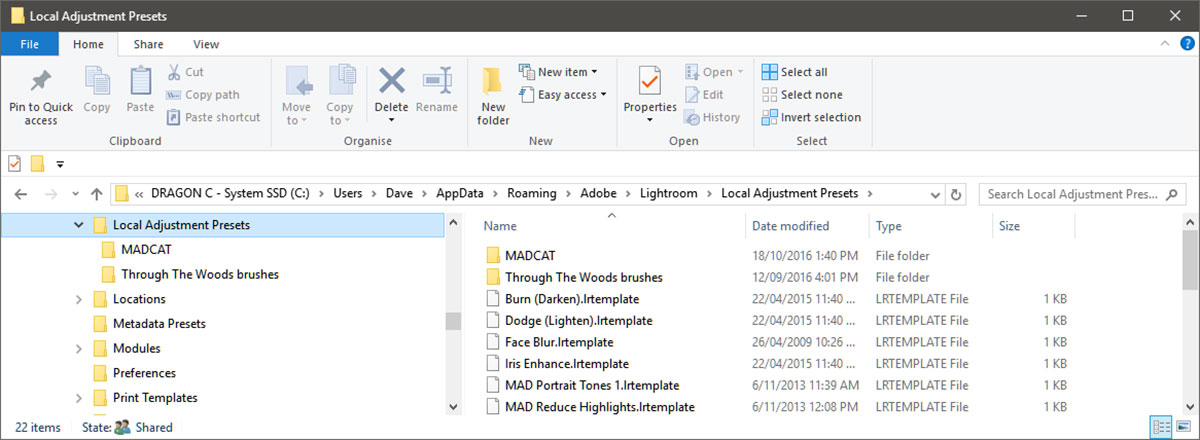
From here navigate into the “Lightroom\Local Adjustment Presets” folder
Locate the Lightroom Local Adjustment Folder
Note, if you have selected “Store presests with this catalog in the Presets tab of the Preferences dialog box then you will have to navigate into the folder containing your catalog and then into the “Lightroom Settings/Local Adjustment Presets” folder instead
Create a new folder
Windows – Right click on the “Local Adjustment Presets” folder and select New->Folder
Mac – Right click inside the “Local Adjustment Presets” folder and select “New Folder”
Name your folder something meaningful. This is not as useful as it is with Presets as Lightroom will not display the folder name but it helps with managing your Brushes.
As with the Presets I generally start with the name of the supplier and then the name of the collection if there will be more than 1 i.e. “Sleeklens – Through The Woods” but that’s just me, go with whatever tickles your fancy 🙂
Go to the file explorer or finder containing your new Brushes (see step 2)
Select the Brushes (CTRL+A / CMD+A)
Copy the Brushes to the clipboard (CTRL+C / CMD+C)
Paste the Brushes into the folder you have just created (CTRL+V / CMD+V)
Restart Lightroom and your new Brushes will be available in the Local Adjustments area in the “Develop” module
Done!
Now that you know how to install new Lightroom Presets and Brushes the World is your Oyster!
There are numerous free Lightroom Presets and Brushes out there to play around with, here are a few suggestions that we recommend:


Subscribe to our VIP Club for Free
Click here for more information
Thankyou for joining our VIP list!