by Dave | Jan 27, 2018 | Lightroom, ON1 Software, Our Journey, Photos, Photoshop, Software, Wildlife Photos
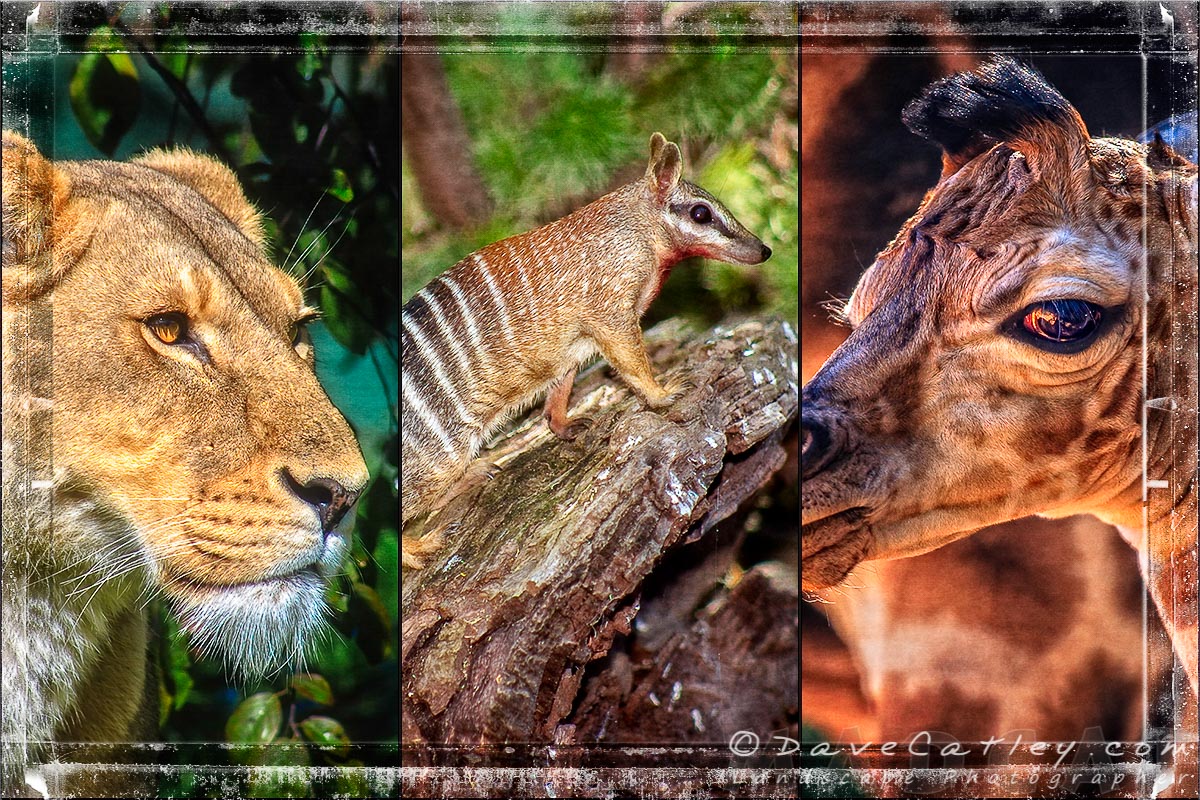
Perth Zoo is an amazing place to visit and experience some of the incredible wildlife from Australia & around the world. To be honest we haven’t been to the Zoo for many years, must be time for another visit, I’m sure there have been many changes over the past few years.
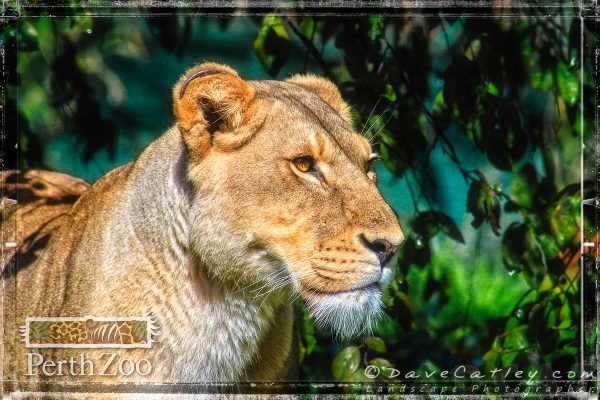
African Lion, Perth Zoo, South Perth,Western Australia
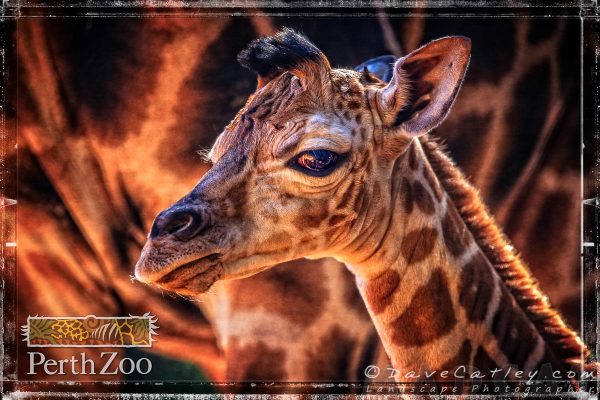
Baby Giraffe, Perth Zoo, South Perth,Western Australia

Bonzai the Numbat, Perth Zoo, South Perth,Western Australia
These gorgeous creatures were captured during our visits between 2003 & 2010 when we were working with the Zoo on their website and I decided to have a play around with them to create some Perth Zoo Photo Art.
Sadly Bonzai the Numbat has since passed away but we were proud to have our images used on the signage around his enclosure for a few years before he died.
Perth Zoo and many other zoo’s around Australia and the World do an amazing job help protect & preserve our wildlife, we owe it it to them to do what we can to support these efforts.
Post Processing
All images were processed in Adobe Lightroom, ON1 Photo RAW 2018 & Adobe Photoshop.
Buy Prints & Photo Products
Did you know it’s a proven fact that being out in nature is great for your mental and physical health!
While you won’t get the full health benefit from our range of prints and photo gifts they are always a great reminder of where you’d rather be.
So be sure to check out our range of Fine Art Prints here in our online gallery and our unique photo gifts (scarves, wall tapestries, beach towels, tote bags and much more) at madaboutwa.com.au.
Note: Our Perth Zoo images are not for sale currently though we would dearly love to create more amazing images and products that could help support the Zoo.
Cheers, Dave
by Dave | Oct 27, 2016 | Articles, Lightroom, Reviews, Sleeklens, Software
Recently I was approached by Jane at Sleeklens to review one of their Landscape themed Lightroom Presets Collections called “Through the Woods”.
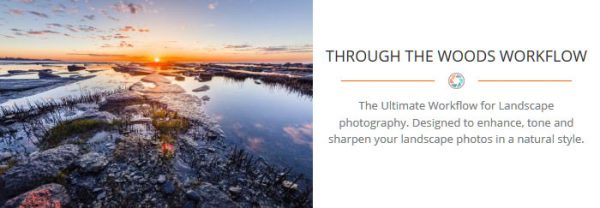
Through The Woods Lightroom Workflow by Sleeklens
While I’m not a big user of other peoples Lightroom Presets I do use Lightroom A LOT and create many of my own Presets to make my workflow smoother so I do appreciate the value of products such as this for people who want a little help getting the most out of their photos in Lightroom.
The Company

As I mentioned above I am not a big user of 3rd party Lightroom Presets and I had not heard of Sleeklens before so I did a bit of research on the web and it turns out they have a very interesting range of Lightroom Presets / Brushes and Photoshop Actions / Overlays and a strong community following.
We are always very fussy about who we work with or recommend, it is our experience that a great product needs great support which only happens if the ethos of the company is appropriate. Badly treated staff will inevitably treat customers the same way!
I was pleasantly surprised when I read the Sleeklens “About Us” page to see that it was about people and quality of service rather than just a corporate blurb. The CEO, Daniel Chabert, has even invited people to email him directly.
As far as support goes Sleeklens have a very extensive FAQ page on their website along with several “How To…” pages and a collection of YouTube video tutorials explaining how to install and use their various products which they link to throughout their web site.
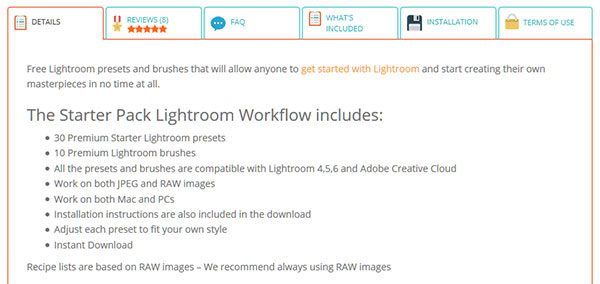
Starter Pack Lightroom Workflow by Sleeklens
They also offer a free Starter Pack of Lightroom Presets to try out.
The Product
The Lightroom Presets Collection I was sent is called “Through the Woods”, it is one of 17 available through the Sleeklens store and is intended for use on Landscape photos. I like how they have given their products interesting and relevant names, kind of makes you think they are actually thinking about what they are creating 🙂
The contents of the collection is quite extensive including an impressive 51 presets & 30 brushes, compatible right back to LR 4. Also included are comprehensive installation instructions for Lightroom Presets & Brushes along with a recipe list of sample images and how they were processed.
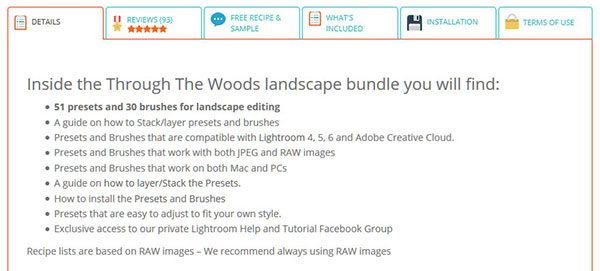
Through The Woods Lightroom Workflow by Sleeklens
The package was delivered by email in a zip file, I believe if you order one from their website you can download the same file on completion of payment or from the link in the email they send you.
Inside the zip file were 4 pdf documents:
- How to install Lightroom Brushes.pdf
- Read this before installing the presets.pdf
- Through the Woods recipe list.pdf
- Terms of Service and Use Sleeklens.pdf
and 2 folders containing the Lightroom Presets & Brushes:
- Through The Woods brushes
- Through The Woods presets
Installation
Installing Lightroom Presests and Brushes is a relatively simple process.
If you open “Read this before installing the presets.pdf” there is a link to a YouTube video which will step you through the process of installing the presets. “How to install Lightroom Brushes.pdf” on the other hand offers written instructions for installing the Brushes. I’m not sure why the different formats for the included instructions but I here is the correct video from Sleeklens for installing Brushes.

How to Install Lightroom Presets & Brushes
If that sounds like too much effort or you have any problems then you can read my post “How To Install Lightroom Presets & Brushes” which offers both “Quick & Dirty” and “Detailed Walkthrough” instructions for installing Lightroom Presets & Brushes.
How to Use the Lightroom Presets & Brushes
Once installed the Presets will appear in the Preset folder you created during installation inside the Develop Module. Expand the folder and you will see a long list of 50 new Presets, with each Preset following a simple naming convention to help you use them effectively.
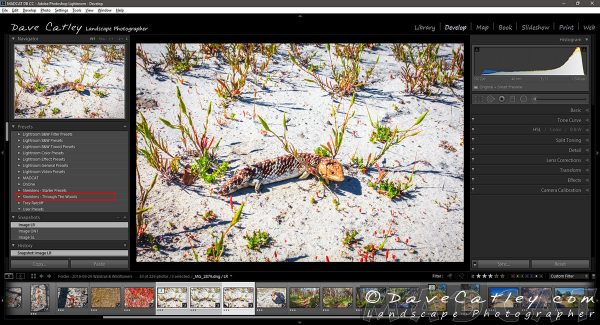
Sleeklens – Through the Woods Lightroom Presets
The Preset names can be broken down as follows:
- “TtW” | <Group>-<Type of Preset> – <Preset Name>
- for example “TtW | 2-Exposure – Darken Shadows”
where:
- “TtW” identifies the Preset being part of the “Through the Woods” collection
- <Group> is a number from 0 to 6 which indicates the order the Presets were intended to be used in
- <Type of Preset> indicates the general type of changes that the Preset will make to the image and is fairly self explanatory (i.e. Base, Exposure, Color …)
- <Preset Name> is a simple description of the what the Preset will do (i.e. Auto Tone, Deep Blue Skies, Add Clarity …)
All In One Presets

Sleeklens All In One Presets
The first group of Presets (group 0) have a Preset Type of “All-In One” indicating that they are intended as a one-click solution or a heavily themed starting point overriding all of the Lightroom Develop settings you may have already made.
This is how a lot of Presets work to make sure you get the full intended effect of the Preset author but it is worth bearing in mind.
Stackable Presets

Sleeklens Stackable Presets
The remainder of the “Through the Woods” Presets are what we call “Stackable” which is an interesting idea as Lightroom does not have the concept of layers like Photoshop does.
What makes “stackable” Presets different from the “All In One” Presets is that they will only change the settings that are relevant to that preset so it won’t overwrite all the other settings you have already used unless it needs to.
However, it is important to bear in mind that the only way to remove any of these “stacked” Preset changes is to use the CTRL-Z (or CMD-Z) undo feature or the history list and then continue editing again. You can’t simply remove a Preset’s changes if you have made other changes since.
For example if you apply the “Brighten” Preset it will only change the Exposure setting and all your other settings will remain unchanged. If you then apply the “Color Pop” Preset and decide you don’t want the changes made by the “Brighten” Preset then you must undo both and start again.
How to Use the Brushes
Brushes work a little differently to Presets, to find the Brushes you must go to one of the Local Adjustment Tools located above the Basic Panel in the Develop Module. Simply select Graduated Filter (M), Radial Filter (SHIFT-M) or Adjustment Brush (K) and click on the “Effect” dropdown to see your Brushes.
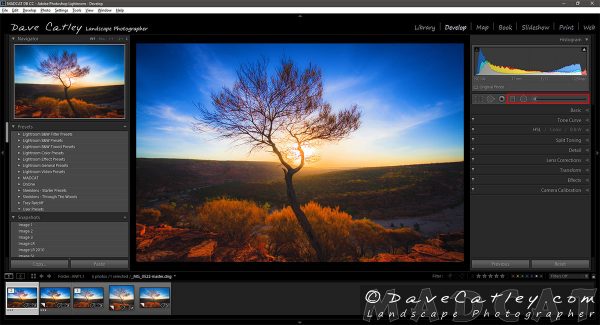
Lightroom Local Adjustment Tools
The naming convention Sleeklens have used for the Brushes is slightly different as there is no logical order in which to use Brushes as there is with Presets.
The Brush names can be broken down as follows:
- “Through the Woods” – <Type of Brush> – <Brush Name>
- for example “Through the Woods – Basics – Contrast and Clarity”
where:
- “Through the Woods” identifies the Brush as being part of the “Through the Woods” collection and groups them all together in the dropdown list
- <Type of Brush> indicates the general type of changes that the Brush will make to the image and is fairly self explanatory (i.e. Base, Color, Haze …)
- <Brush Name> is a simple description of the what the Brush will do (i.e. Destaurate, Warmer, Darken Shadows …)
To use a Brush:
- Select one of the Local Adjustment Tools:
- Graduated Filter (M)
- Radial Filter (SHIFT-M)
- Adjustment Brush (K)
- Select a brush from the Effects dropdown
- Use the Local Adjustment Tool you selected as you would normally
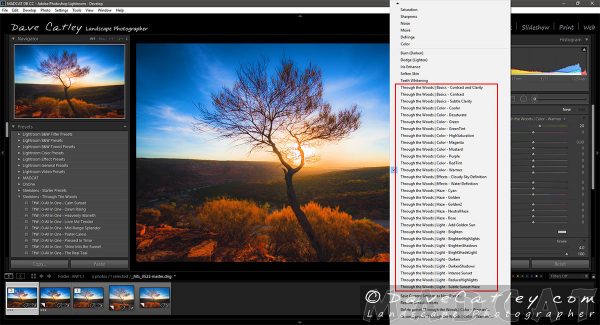
Sleeklens – Through the Woods Lightroom Brushes
Once applied you can tweak any of the settings to achieve the effect you desire. Unlike Presets, Brushes have the added benefit that they can be altered or removed at any time without having to go back through the History list.
The Review
In order to review the “Through the Woods” Preset Collection I selected a few images that I had processed in Lightroom using my normal workflow.
I reset the lightroom settings for each image and then attempted to see if I could achieve a similar look in a similar time frame with the Sleeklens Presets.
Image 1 – “Stumpy the Bob-Tailed Lizard”
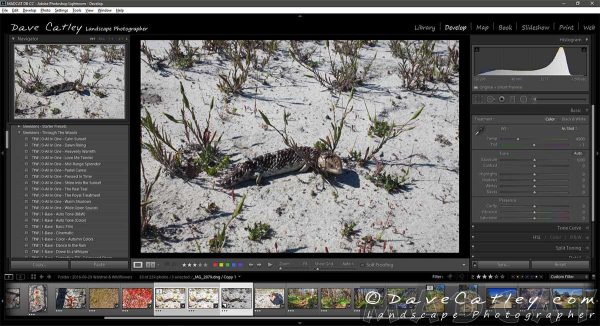
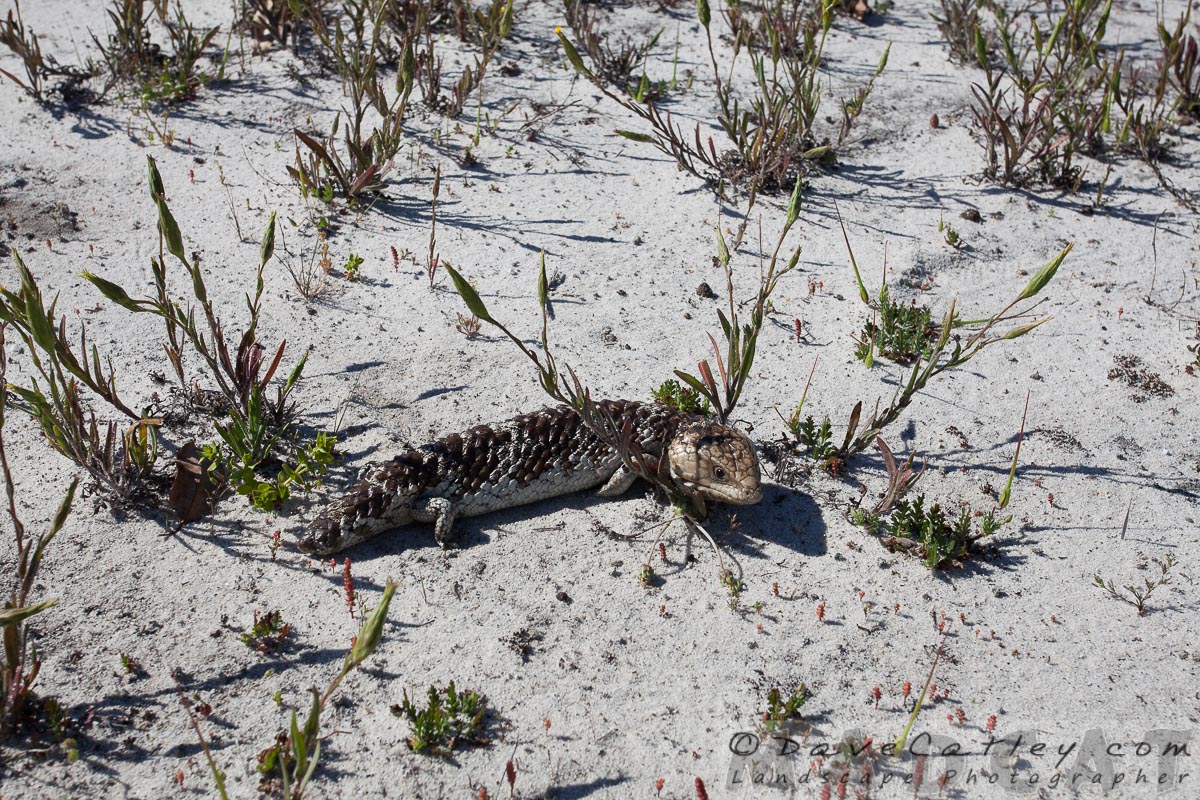
Lightroom Image 1, Stumpy the Bob-Tailed Lizard – Original Image
The first image I chose was of a Bob-Tailed Lizard (they’re actually called “Shingleback’s”) we came across during a recent bush walk in Whiteman Park. It was a bright sunny day with no clouds in the sky and Maggie almost stood on the well camouflaged little guy while we were getting some wildflower pics of to the side of the track.
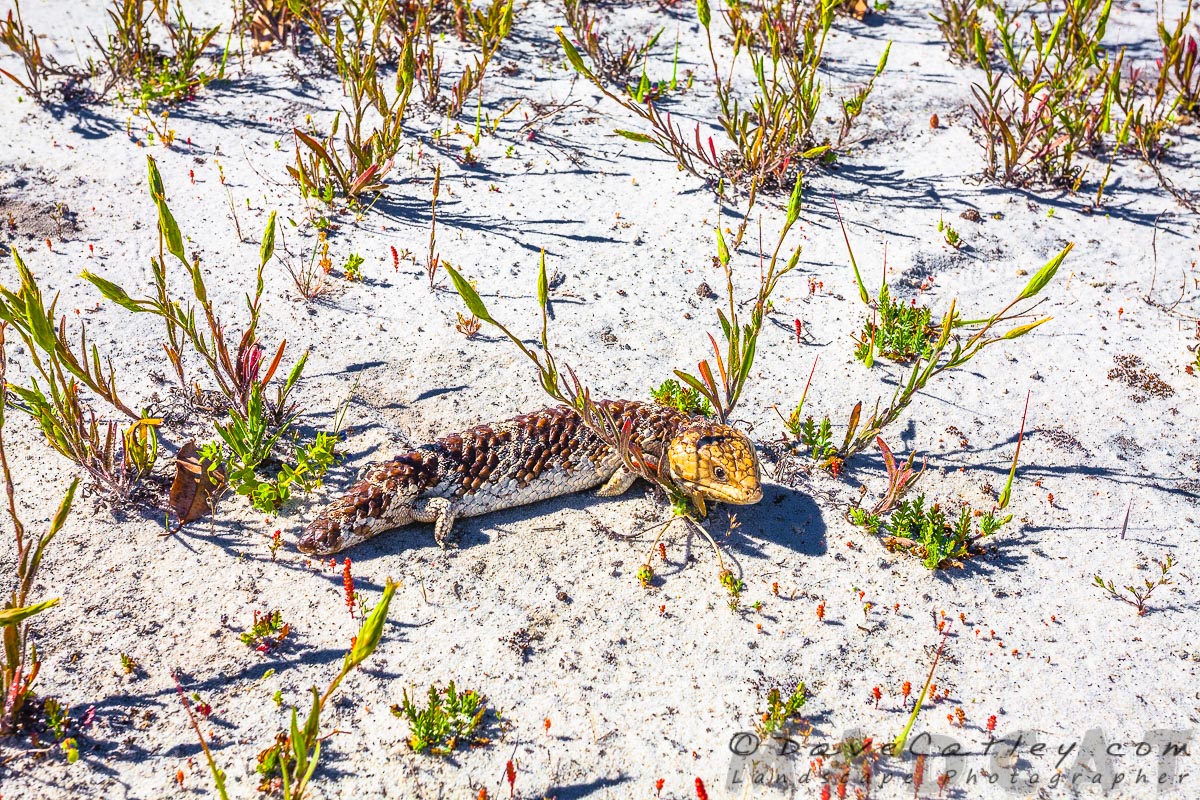
As you can see above, the photo came out a little underexposed and very dull & flat looking. What I wanted to achieve with this image was to showcase the stunning colours of the golden brown lizard, the green foliage and the red flowers in contrast with the reflected light from the almost white sandy soil.
First I tried the “All In One” Presets but I have to say none of them worked for me. I do have my own style and I found that I could not even get close to something to work with using these Presets.
Moving on to the “Stackable” Presets I had more luck. Below you can see what I managed to achieve with the “Sleeklens “Through the Woods” Presets compared with the original:
Original RAW Image | Sleeklens Preset Adjustments
and compared with my own Lightroom adjustments:
My Lightroom Adjustments | Sleeklens Preset Adjustments
As you can see these Sleeklens Presets did a great job of turning the dull lifeless original into something vibrant and engaging, it was also pretty easy to get very close to my original Lightroom adjustments.
Here is the Recipe I used for “Stumpy the Bob-Tailed Lizard”
|
- TtW – 1-Base – Auto Tone {Color}
- TtW – 1-Base – High Dynamic Range
- TtW – 3-Color Correct – Reduce Blue
- TtW – 4-Tone-Tint – Color Pop
- TtW – 5-Polish – Add Clarity
- Set Vibrance to +60
- Set Saturation to +60
- Set Exposure to +10
- Set Whites to -60
- Set Blacks to +80
- Set Blue Saturation to -60
- Set Blue Luminance to -75
- Brush – “Color – Red Warmer” at 25% flow on the lizard
|
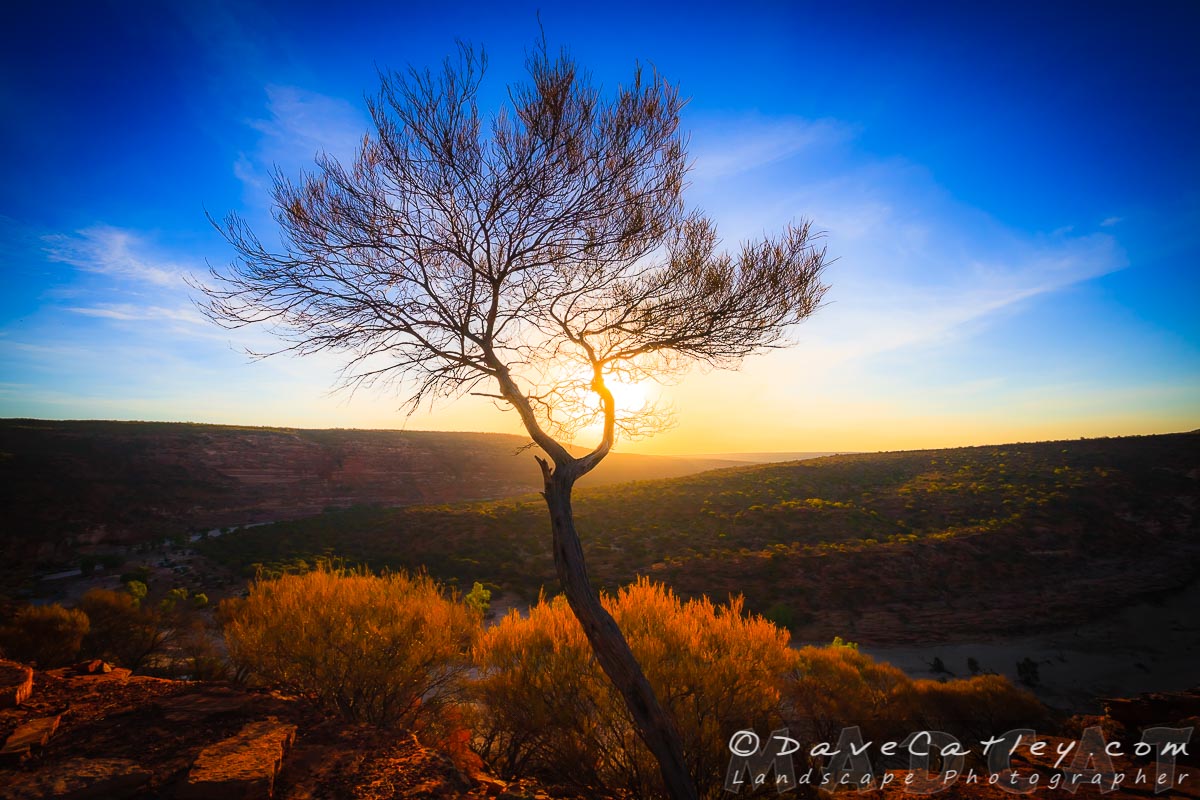
Image 2 – “Dead River Tree”
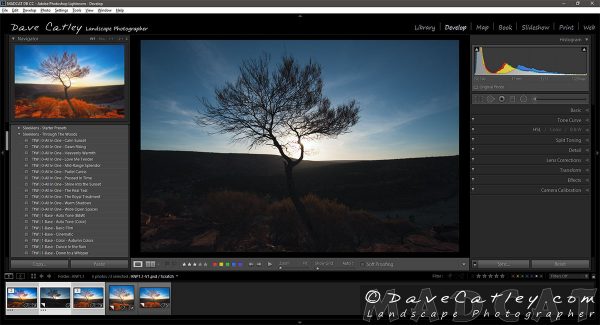
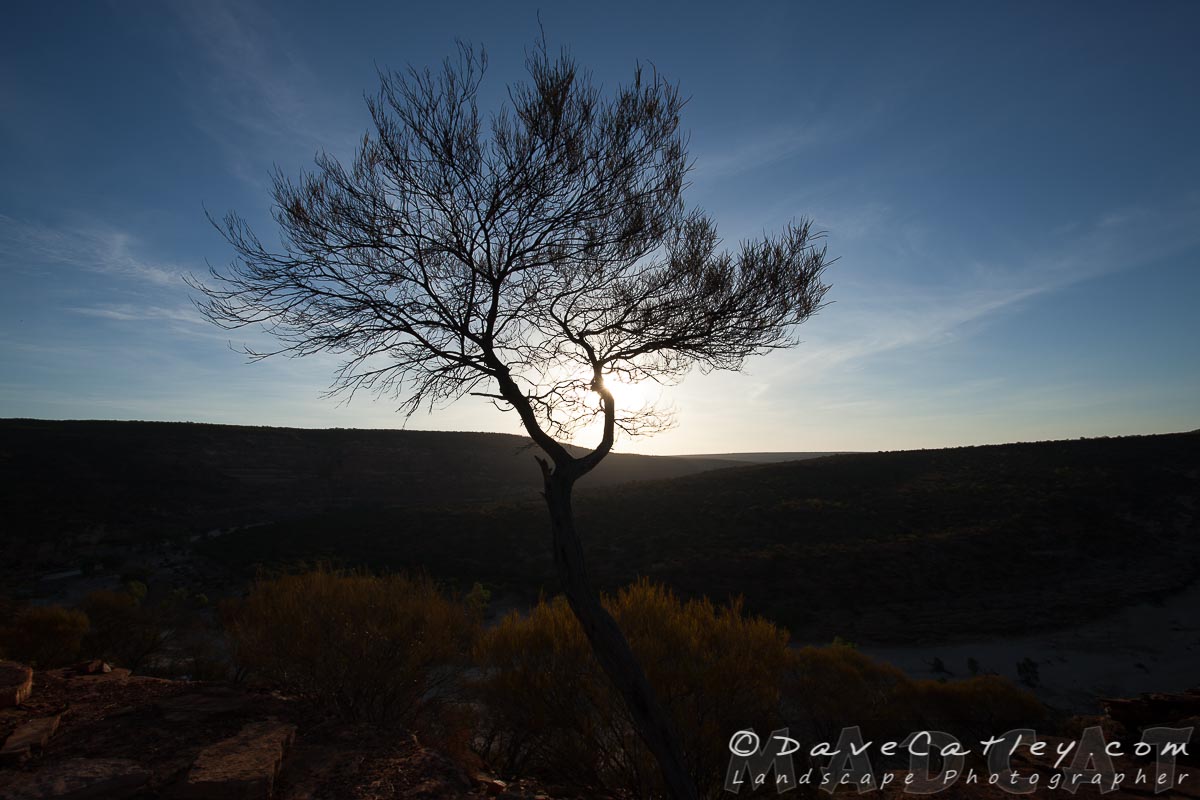
Lightroom Image 2, Murchison River, Kalbarri – Original Image
For the second image I wanted to try something different so I selected a sunset shot that I took a few years ago of the Murchison River in Kalbarri. We were there in March and there was virtually no water in the river so I had to get a bit more inventive to get some interesting shots without highlighting a dry parched riverbed!
Again, I found the “All In One” Presets didn’t get me very far. The “Calm Sunset” was the closest but not at all inspiring. To be honest I didn’t really have great expectations for the “All In One” Presets as different images often require completely different processing so what works for one image can look terrible on another.
Unlike “Stumpy the Bob-Tailed Lizard”, this photo was exposed perfectly considering I was capturing a sunset with a single exposure. Ironically I was still left with the same overall levels of darkness across the image to prevent the sun from being totally blown out! It never ceases to amaze me just how much detail can be pulled out of the shadows with modern day digital SLR’s 🙂
Below you can see what I achieved with the “Through the Woods” Presets compared with the original:
Original RAW Image | Sleeklens Preset Adjustments
and compared with my own Lightroom adjustments:
My Lightroom Adjustments | Sleeklens Preset Adjustments
I must admit that I was skeptical that the Sleeklens Presets would even get close to replicating the settings I used for this image but again I was pleasantly surprised, not just at how close I was able to get to my adjustments but how quickly I could use the Sleeklens Presets to get a great result.
Now I’m wondering if a nice and subtle sunburst would finish of this image nicely. Argh, look what’s happening, I try out a set of Presets and start thinking how other products from companies like Sleeklens might help me. This could get addictive …
Here is the Recipe I used for “Dead River Tree”
|
- TtW – 1-Base – Auto Tone {Color}
- TtW – 1-Base – High Dynamic Range
- TtW – 3-Color – Deep Blue Skies
- Set White Balance to Daylight
- TtW – 4-Tone-Tint – Color Pop
- TtW – 5-Polish – Less Clarity(Overall Haze)
- TtW – 5-Polish – Add Contrast
- Set Camera Profile to Camera Landscape
- Set Saturation to +24
- Set Highlights to -23
- Set Exposure to +10
- Brush – “Light – Add Golden Sun” at 25% flow on the sun’s glow
- Brush – “Color – Red Tint” at 100% flow on the bushes & rocks
- TtW – 6-Vignette – Subtle Black
|
Conclusion
I found the Sleeklens “Through the Woods” Presets to be very intuitive and easy to use. With a little experimentation and some tweaking of the results I was able to get pretty close to the original Lightroom adjustments I made for both images.
Amazingly, although the final results were visually similar the Lightroom settings I used originally were completely different to the settings used by the Sleeklens Presets which really shows just how versatile Lightroom is as a post processing tool for Photographers.
The additional use of the “Through the Woods” brushes was also very helpful in making subtle but beneficial changes to the images.
Time wise the Sleeklens adjustments were very quick to use and very versatile. Not all of the Presets will be useful to everyone, I doubt I would ever use the “All In One” Presets but everyone has their own style and the wide variety of options available in this collection makes it easy to achieve the look you are going for.
Pros
|
Cons
|
- Easy to install and get started
- Stackable Presets are very intuitive to use
- Wide variety of Presets leads to endless creative possibilities
- Brushes are a great bonus
- Good value for money
- Good Support & Video Tutorials
|
- I didn’t find the “All In One” Presets worked well with my images & style
- You might get addicted to third party Lightroom & Photoshop plugins …
|
Should you buy the Sleeklens “Through the Woods” Collection?
For a Lightroom novice the “Through the Woods” Preset Collection will speed up your image processing significantly while also teaching how certain effects can be created with the multitude of Lightroom settings available.
For experienced or professional photographers I could still see a place in your Lightroom workflow if you’re looking for a set of tools to get the job done quickly & efficiently or if you’re looking for some creative inspiration.
Obviously the Sleeklens “Through the Woods” Preset Collection will not be for everyone and I highly recommend trying out their Free Lightroom Presets Starter Pack first and watching some of their tutorial videos if you’re not sure.
Ultimately it’s up to every individual how they spend their hard earned cash but I can’t imagine anyone being disappointed if they decide to purchase the Sleeklens “Through the Woods” Preset Collection.
We welcome you feedback regarding this review, please leave any comments you may have below 😎
Links
Disclaimer:
All of our reviews are completely unbiased and will generally be about products or services we use here at MADCAT Photography or that we are willing to personally recommend.
Whilst we do not get paid to review products we may receive free products in return to enable us to perform the reviews.
Additionally, many links you will see on this site are affiliate links which allow us to earn a commission while not costing you any more, in fact we will often be able to offer discount codes or limited time special deals.
If you wish to help support this site then please consider using our links 🙂
Cheers,
Dave
MAD About WA
MAD About WA is our another Project Maggie & I are working on. We will be blogging about things to do in and around Perth and Western Australia as we travel and experience what is on offer in this amazing state we live in.
Many of my new images will be posted there and made available on a wide variety of clothing, household & lifestyle products and other many items.
If you like to be surrounded by beauty and nature even when you can’t get outdoors then check out what we have to offer in our online store 🙂
Who wouldn’t want their own baby Dolphin to take to the beach after all!
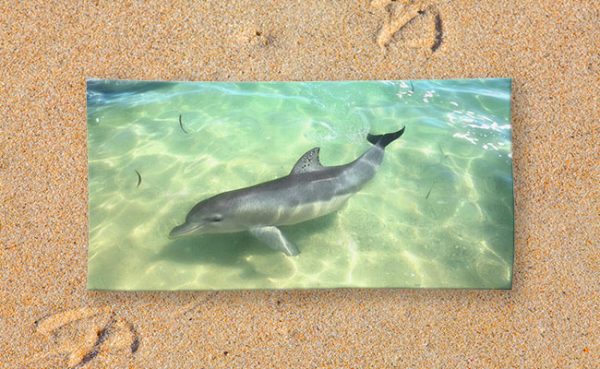
Beach Towel – Samu the Dolpin from Monkey Mia, Shark Bay

Round Beach Towel – Samu the Dolpin from Monkey Mia, Shark Bay
by Dave | Oct 21, 2016 | Articles, How To ..., Lightroom, News, ON1 Software, Sleeklens, Software

Lightroom Presets & Brushes are great tools to help you speed up your workflow and improve your creativity. You can create them yourself or purchase / download them from various websites.
This guide will teach you how to install Presets & Brushes that you have downloaded.
For those of you that are more familiar with how Windows / Mac OSX works then the Quick and Dirty guides should be more than enough. For others the Detailed Walkthroughs will tell you everything you need to know.
Installing Lightroom Presets – The Simple Method

Installing Lightroom presets from within Lightroom is a very quick and simple process:
Quick and Dirty:
- Go to the Lightroom Develop module
- Right click in the Presets tab to create a new folder if required
- Right click on the Preset folder you wish to import your new Presets to and select “Import”
- Locate the Presets to import and click the “Import” button
- Done!
Detailed Walkthrough:
- Locate the folder containing the Presets that you want to install.
If you have purchased online or downloaded free samples they will most likely be in a “zip” file
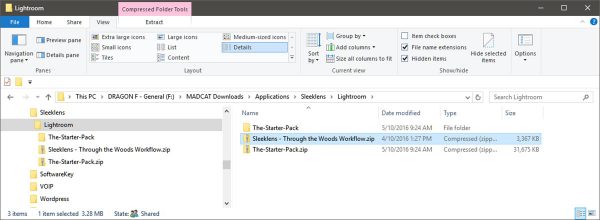
Locate the Downloaded Presets
- Unzip the file you downloaded (if required):
- Windows – Right click on the file, select “Extract All…”
- Mac – Doubleclick on the file
- Navigate to the unzipped folder containing the new Presets (they may be in a sub-folder). The Preset files will have a file extension of “.lrtemplate”
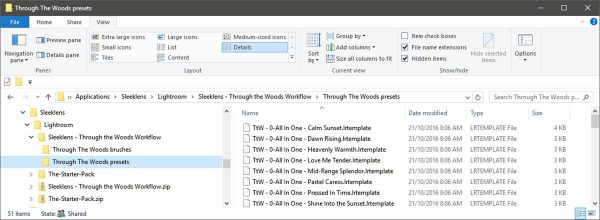
Locate the Extracted Preset Folder
- Copy the location of the Preset folder to the clipboard
- Windows – Right click on the Windows Explorer address bar and select “Copy address as text”
- Mac – Right click on the Finder folder then hold down the Option key and select “Copy <folder name> as Pathname”
- Run Lightroom and enter the “Develop” module
- At this point you can either:
- Select an existing Preset folder to install your presets into
- or …
- Right click anywhere in the Presets tab on the left and select “New Folder”
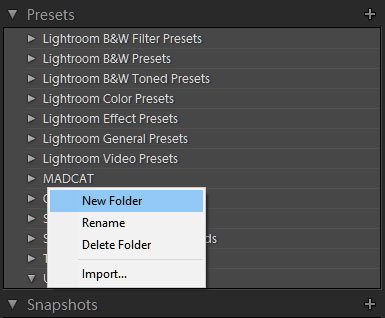
Create a New Preset Folder in Lightroom
Name your folder something meaningful. I generally start with the name of the supplier and then the name of the collection if there will be more than 1 i.e. “Sleeklens – Through The Woods” so that all presets from the same supplier will be grouped together with each set in it’s own folder. But that’s just me, go with whatever floats your boat 🙂
- Right click on the chosen folder and select “Import” …
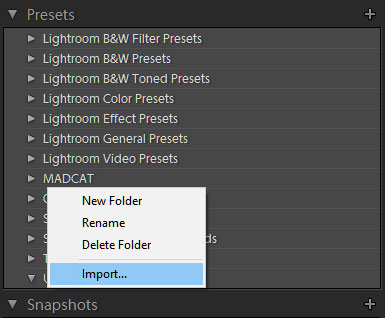
Import New Presets in Lightroom
- Locate the Presets you wish to install. If you copied the folder path in step 3 then paste it into the import window:
- Windows – Right click on the address bar and select “Edit address”, right click again and select “Paste” then press “Enter”
- Mac – Press “CMD+SHIFT+G” then “CMD+V” and click on “Go”
- Select the Presets to import and click “Import”
- Your Presets are now ready to use
- Done!
Installing Lightroom Presets – Behind the Scenes

If you want to understand what happens Behind the Scenes when you install presets or want to know how to do it manually it’s not really that much harder:
Quick and Dirty:
- Run Lightroom
- Open the “Preferences” dialog
- Windows – Select “Preferences” in the “Edit” menu
- Mac – Select “Preferences” in the “Lightroom” menu
- Go to the “Presets” tab and click on “Show Lightroom Presets Folder …”.
A file explorer or finder window will open in the Adobe configuration area
- From here navigate into the “Lightroom\Develop Presets” folder
- Note, if you have selected “Store presests with this catalog in the Presets tab of the Preferences dialog box then you will have to navigate into the folder containing your catalog and then into “Lightroom Settings/Develop Presets” instead
- Create a new folder and copy your new Presets into it
- Restart Lightroom and your new Presets will be available in the “Develop” module
- Done!
Detailed Walkthrough:
If you need a detailed walkthrough then you probably shouldn’t be doing anything behind the scenes!
Installing Lightroom Brushes

For reasons known only to Adobe there is no interface in Lightroom to import new Brushes. You can create them yourself from the Local Adjustments area but if you want to add new ones you have purchased or downloaded then you’ll have to do it manually.
Ironically, the method for installing new Brushes is almost identical to the “Behind the Scenes” method for installing Presets that I described above!
Quick and Dirty:
- Run Lightroom
- Open the “Preferences” dialog box
- Windows – Select “Preferences” in the “Edit” menu (or press CTRL+,)
- Mac – Select “Preferences” in the “Lightroom” menu (or press CMD+,)
- Go to the “Presets” tab and click on “Show Lightroom Presets Folder …”.
A file explorer or finder window will open in the Adobe configuration area
- From here navigate into the “Lightroom\Local Adjustment Presets” folder
- Create a new folder and copy your new Brushes into it
- Restart Lightroom and your new Brushes will be available in the “Develop” module
- Done!
Detailed Walkthrough:
I know what you’re thinking, a few paragraphs ago I was telling you that you shouldn’t be going Behind the Scenes to install Presets if you needed a detailed walkthrough!
Now I’m telling you that this is the ONLY way to install new Brushes and here is a detailed walkthough … Don’t Panic it’s not that hard and if you follow the instructions below you’ll be fine, honest!
- Locate the folder containing the Brushes that you want to install.
If you have purchased online or downloaded free samples they will most likely be in a “zip” file

Locate the Downloaded Presets
- Unzip the file you downloaded (if required):
- Windows – Right click on the file and select “Extract All…”
- Mac – Doubleclick on the file
- Navigate to the unzipped folder containing the new Brushes (they may be in a sub-folder). The Brush files will have a file extension of “.lrtemplate”
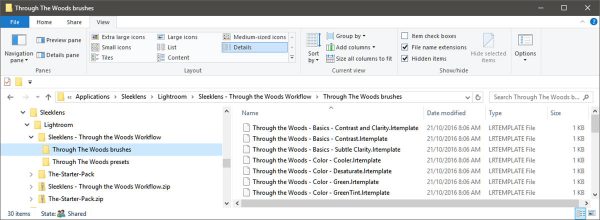
Locate the Extracted Brushes Folder
- Run Lightroom
- Open the “Preferences” dialog box
- Windows – Select “Preferences” in the “Edit” menu (or press CTRL+,)
- Mac – Select “Preferences” in the “Lightroom” menu (or press CMD+,)
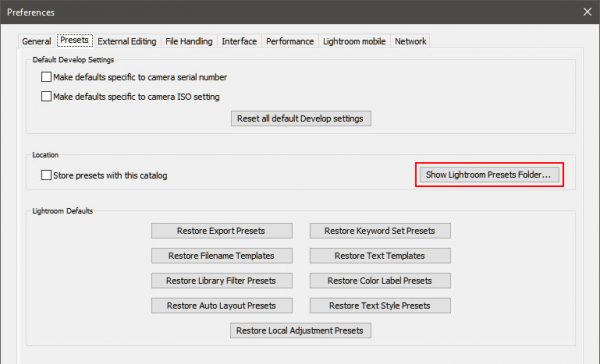
Lightroom Preferences – Preset Tab
- Go to the “Presets” tab and click on “Show Lightroom Presets Folder …”.
A file explorer or finder window will open in the Adobe configuration area
- From here navigate into the “Lightroom\Local Adjustment Presets” folder
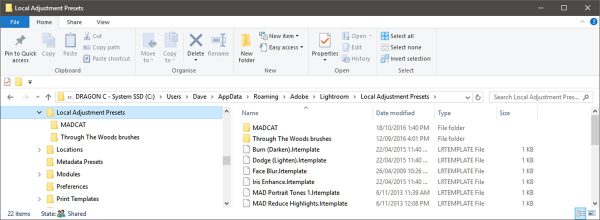
Locate the Lightroom Local Adjustment Folder
- Note, if you have selected “Store presests with this catalog in the Presets tab of the Preferences dialog box then you will have to navigate into the folder containing your catalog and then into the “Lightroom Settings/Local Adjustment Presets” folder instead
- Create a new folder
- Windows – Right click on the “Local Adjustment Presets” folder and select New->Folder
- Mac – Right click inside the “Local Adjustment Presets” folder and select “New Folder”
- Name your folder something meaningful. This is not as useful as it is with Presets as Lightroom will not display the folder name but it helps with managing your Brushes.
As with the Presets I generally start with the name of the supplier and then the name of the collection if there will be more than 1 i.e. “Sleeklens – Through The Woods” but that’s just me, go with whatever tickles your fancy 🙂
- Go to the file explorer or finder containing your new Brushes (see step 2)
- Select the Brushes (CTRL+A / CMD+A)
- Copy the Brushes to the clipboard (CTRL+C / CMD+C)
- Paste the Brushes into the folder you have just created (CTRL+V / CMD+V)
- Restart Lightroom and your new Brushes will be available in the Local Adjustments area in the “Develop” module
- Done!
Now that you know how to install new Lightroom Presets and Brushes the World is your Oyster!
There are numerous free Lightroom Presets and Brushes out there to play around with, here are a few suggestions that we recommend:






Subscribe to our VIP Club for Free
Click here for more information
Thankyou for joining our VIP list!